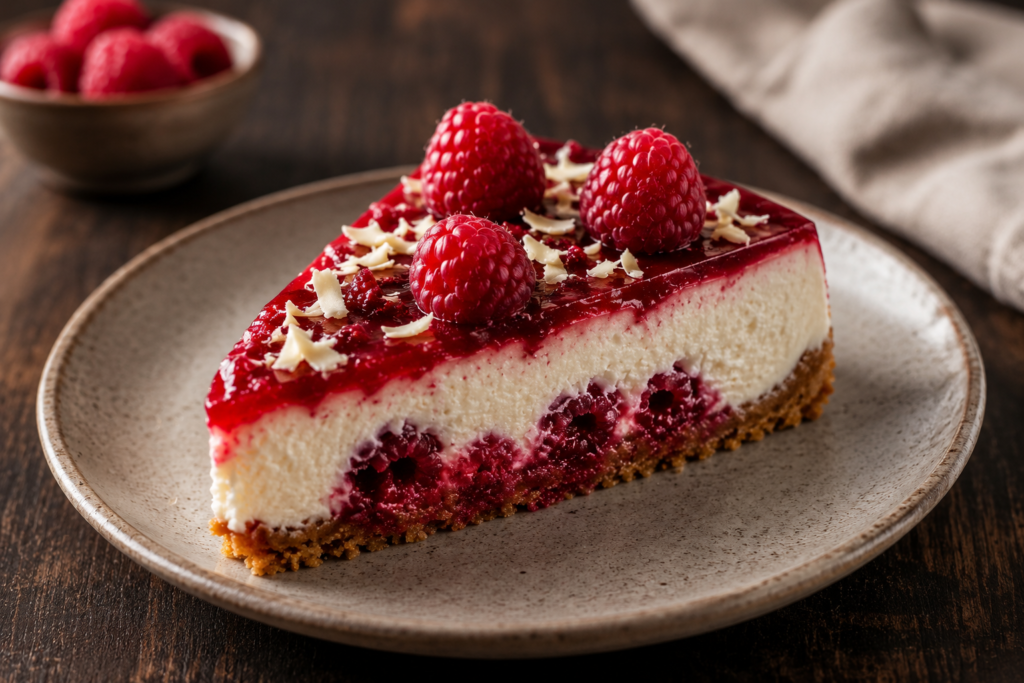
Raspberry Cheesecake: A Pastry Chef’s Guide to Using Fresh Berries the Right Way

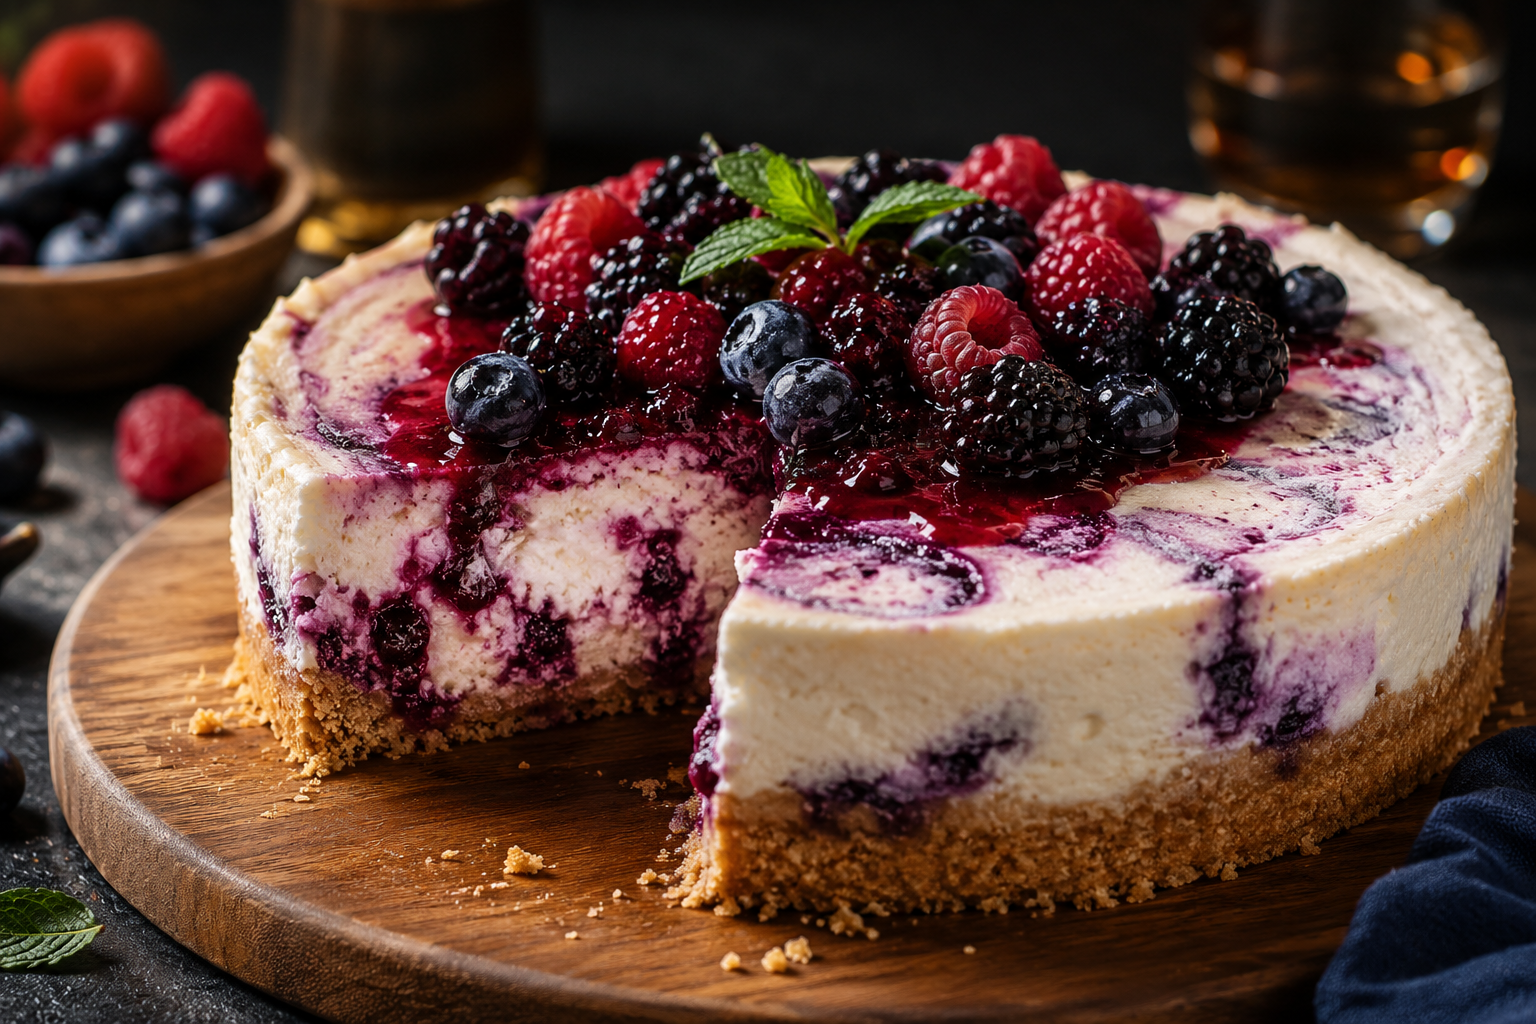
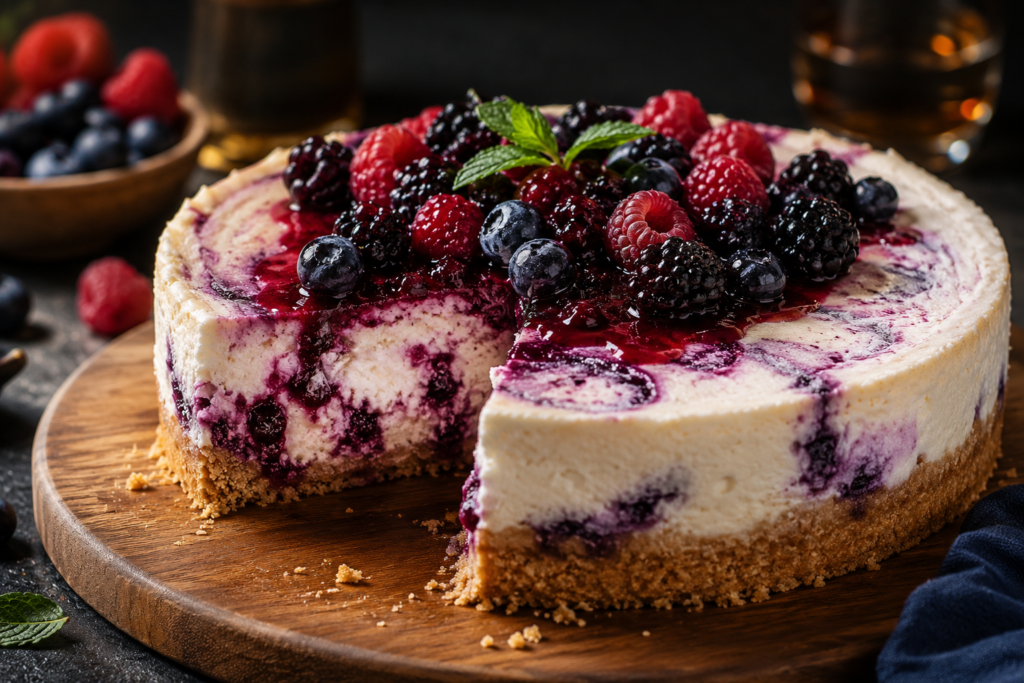
Raspberry Cheesecake

Raspberry cheesecake is deceptively simple to get wrong. The flavour pairing itself is never the issue — raspberry’s sharp tartness against rich cream cheese is one of the most reliable combinations in baking. The real question people run into is technical: what happens when you put juicy fresh raspberries directly into a cheesecake batter, and whether that’s even a good idea in the first place.

As a pastry chef, that’s genuinely the most common question I get about this dessert — followed closely by whether it’s possible to make a stripped-down, minimal-ingredient version without losing what makes raspberry cheesecake worth making. This guide answers both, then walks you through a full recipe.

Key Takeaways

  • Raspberries are excellent on cheesecake, but fresh whole berries mixed directly into the batter can release excess moisture and throw off the texture.
  • The safer techniques are swirling a reduced raspberry sauce through the filling, or adding fresh berries as a topping rather than baking them inside.
  • A genuinely minimal-ingredient raspberry cheesecake is achievable, but it means going no-bake rather than trying to strip down a baked version.
  • The most common cheesecake mistakes here are the same ones that affect any cheesecake — overmixing, overbaking, and rushing the chill time.
  • Full recipe and an FAQ built from real reader questions are below.

Can You Put Fresh Raspberries in a Cheesecake?

Yes, but how you add them matters more than whether you use them at all. Raspberries are mostly water, and dropping whole fresh berries directly into a wet cheesecake batter can release liquid as it bakes, leading to a filling that’s uneven, streaky, or slightly loose in spots rather than a clean, uniform texture. This is a common trap for home bakers who assume “fresh is always better” without accounting for how much moisture the fruit is carrying.

The more reliable approach is to cook the raspberries down into a thick sauce first — simmering with a bit of sugar until it reduces — then swirl that concentrated sauce through the batter rather than the whole berries. This gives you the same raspberry flavour and colour without the raw moisture working against your filling. If you want the visual and textural appeal of whole berries, adding them as a topping after baking, rather than mixing them in, sidesteps the moisture problem entirely.

Are Raspberries Actually Good on Cheesecake?

Unquestionably yes — raspberry is one of the most dependable cheesecake pairings, not just a trendy topping choice. Its tartness cuts through cream cheese’s richness the same way lemon does, but with more sweetness and less sharpness, which makes it an easier flavour to like broadly. That’s part of why it consistently shows up as a favourite pairing rather than a niche one.

As for how it compares to other desserts in terms of being “fattening” or unhealthy — that’s a hard thing to rank meaningfully. Rich baked desserts in general carry similar calorie density per slice, and raspberry cheesecake isn’t an outlier in either direction; the fruit itself is relatively low in sugar compared to many other toppings, so if anything it’s a lighter choice than a caramel or chocolate-heavy version. Whether it counts as “disliked” really comes down to personal taste rather than any broad consensus — tart fruit desserts tend to be more polarizing than plain vanilla or chocolate ones, but that’s true of fruit desserts generally, not raspberry cheesecake specifically.

What’s the Best Recipe — And Can You Really Simplify It?

There isn’t one single “best” recipe so much as a best recipe for what you’re going for. A classic version with a ginger biscuit and cream cheese base gives you a smooth texture using gelatin to set. If you’re after a genuinely minimal-ingredient version — the 2, 3, or 4-ingredient versions people search for — that almost always means going no-bake rather than trying to strip a baked recipe down too far. A basic no-bake version comes down to cream cheese, raspberry purée or jam, and whipped cream, with a pre-made crust as an optional fourth component.

The tips that come up most for raspberry cheesecake specifically are about handling the fruit correctly — reduce or drain excess liquid before adding it, and don’t fold fresh berries in at the last second expecting them to stay intact through mixing. Beyond that, the general cheesecake mistakes apply here the same as anywhere else: overmixing causes lumps, and rushing the chill time leaves the filling too soft to slice cleanly.

The Recipe: No-Bake Raspberry & Ginger Biscuit Cheesecake
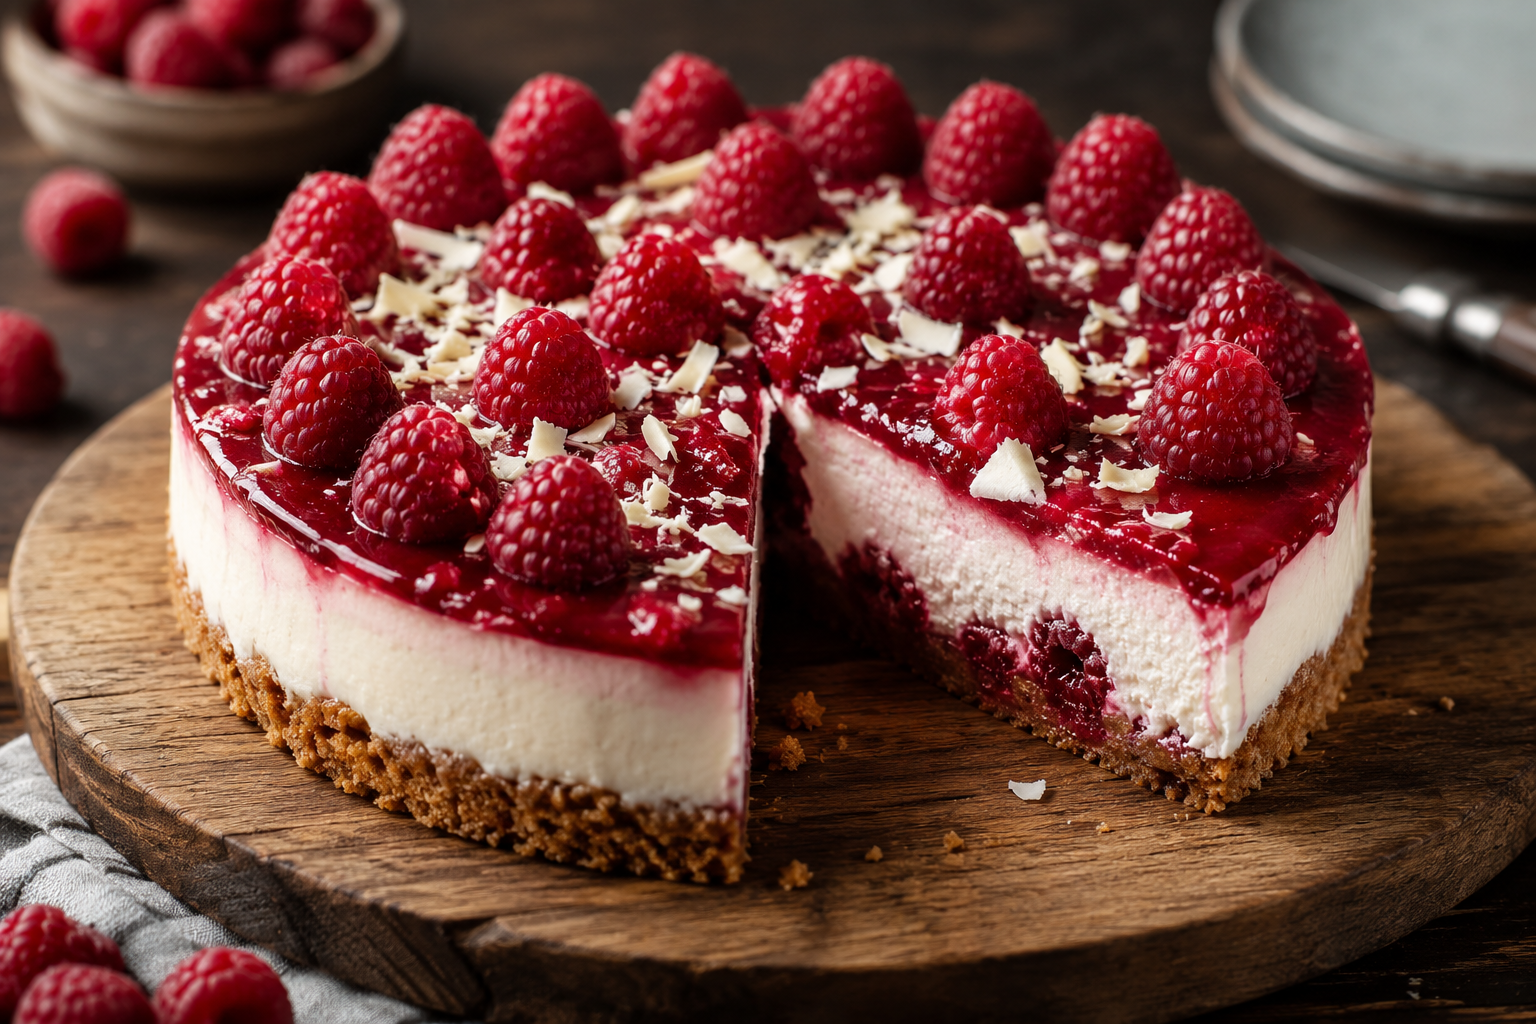
Raspberry Cheesecake

Raspberry Cheesecake

Flavor & Style: A delicious no-bake raspberry and ginger biscuit cheesecake featuring a smooth cream cheese filling set with gelatin and topped with fresh raspberries and warmed jam.
Yield & Timing: Yields 5 servings, with a prep time of 10 minutes, a cooking/dissolving time of 45 minutes, plus chilling time in the refrigerator until set.
Prep Time 10 minutes
Cook Time 25 minutes
Total Time 55 minutes
Servings: 5 Servings
Course: Dessert

Ingredients
  

  • 250 g 2.1/2 biscuit crumbs ginger biscuits
  • 125 g 1/2 cup butter, melted
  • 2 tsp. 10ml finely grated lemon zest
  • 80 g 1/4 cup raspberry jam, warmed
  • 250 g Raspberries
  • 2 tsp. 10ml gelatin
  • 250 g cream cheese at room temperature
  • 125 g 1/2 cup sugar
  • 1 Tbsp. lemon juice
  • 300 ml thickened/heavy cream

Method
 

  1. Grease and line a 23cm springform baking pan/tin with non-stick baking paper. Crush the biscuits until they look like fine breadcrumbs, add the butter and lemon zest, mix thoroughly and then press into the bottom and sides (if you like the biscuit base on the sides) of the baking pan/tin. Place in the freezer for about 30 mins.
  2. Add 2 Tbsp. water in a heatproof bowl over a pan of simmering water, add the gelatin and stir until completely dissolved (or just follow the instructions on the packet).
  3. While the gelatin is cooling, beat the cream cheese, sugar and lemon juice in a mixing bowl or if using a food processor, pulse until smooth, scraping down the sides of the bowl every few minutes so that you don’t have any lumps at the end and beating again until smooth.
  4. Pour into prepared tin, refrigerate until set, and then decorate by sprinkling the raspberries over the top, and brush with the warmed jam.

    Frequently Asked Questions

    • What is the 3-ingredient cheesecake? A no-bake version using cream cheese, raspberry purée or jam, and whipped cream, set in the fridge without eggs or baking.
    • Can you put fresh raspberries in a cheesecake? Yes, but whole fresh berries mixed directly into the batter can release excess moisture — a reduced raspberry sauce swirled in, or fresh berries added as a topping, are more reliable techniques.
    • What are common cheesecake mistakes to avoid? Overmixing, and not chilling long enough before slicing.
    • What is the secret to a good cheesecake? Room-temperature ingredients and minimal mixing once the ingredients are combined — most texture problems trace back to one of those two things.
    • Are raspberries good on cheesecake? Yes — raspberry’s tartness balances cream cheese’s richness in much the same way lemon does, with a bit more natural sweetness.
    • What is the hardest cheesecake to make? There’s no single hardest recipe; cheesecake in general can be technically demanding because it’s sensitive to overmixing and rapid cooling.

    Final Thoughts

    Raspberry cheesecake rewards a bit of technique with the fruit itself — reduce it, swirl it, or save it for the topping, rather than folding whole berries straight into the batter. Get that right, along with the same fundamentals that apply to any cheesecake, and you end up with a slice that looks as good as it tastes.

    Give the recipe a try this week, and if your swirl disappears or your filling comes out watery, leave a comment — I’ll help you figure out exactly where the moisture got away from you.
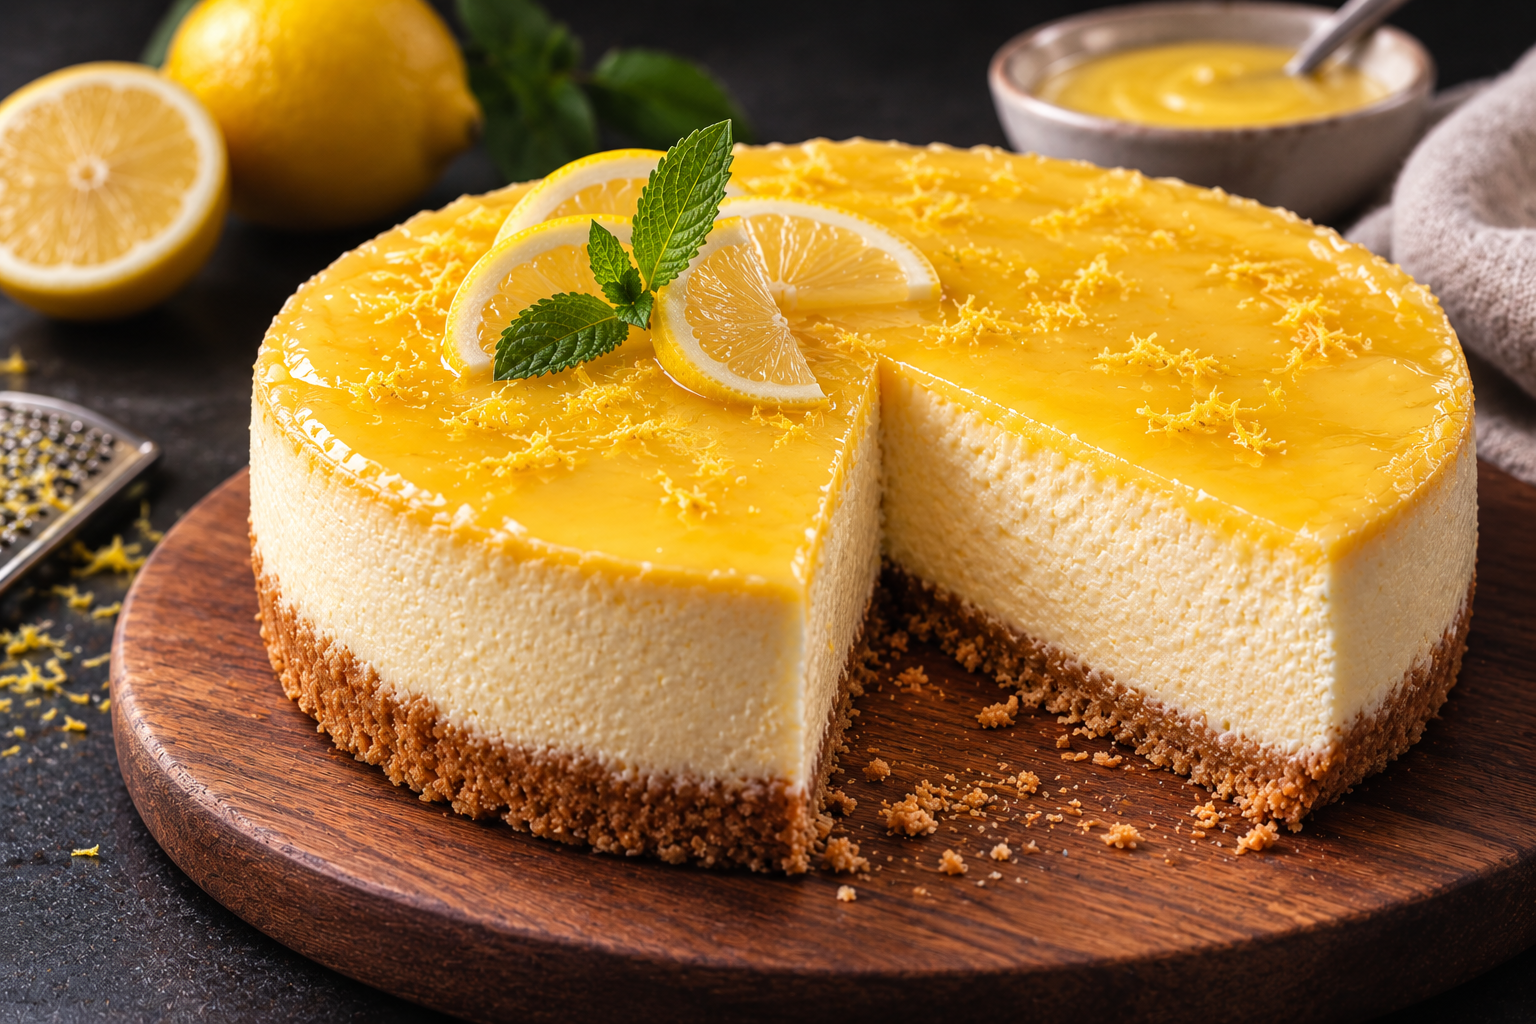
    Lemon Cheesecake: A Pastry Chef’s Guide to the Classic Done Right

    Lemon Cheesecake
    Lemon cheesecake

    Lemon cheesecake earns its reputation as one of the most requested cheesecake flavours for a simple reason — it solves cheesecake’s one real weakness. Cream cheese filling, on its own, can feel heavy after a few bites. Lemon cuts straight through that richness with brightness and acidity, which is why it’s stayed a bakery staple in Toronto and beyond for decades, long before more novelty flavours came along.

    As a pastry chef, most of what people ask me about this dessert comes down to getting the classic right — what actually goes into a proper lemon filling, what crust pairs best, and what lemon juice is doing beyond just flavour. This guide covers all of it, then gives you a full old-fashioned-style recipe.

    Key Takeaways

    • Lemon cheesecake works because acidity balances cream cheese’s richness — the same principle behind most fruit cheesecakes, but lemon does it more directly than sweeter fruits.
    • A true lemon filling usually means both zest and juice worked into the batter, paired with ingredients like lemon yogurt for a bright citrus hit.
    • Lemon juice isn’t just flavour — its acidity interacts with the dairy and affects how the filling sets, which is why recipes are specific about the amount.
    • A classic graham crust remains the most common pairing, whether pre-made or homemade for an old-fashioned style.
    • Full recipe and an FAQ built from real reader questions are below.

    What Actually Goes Into a Lemon Cheesecake Filling?

    A proper lemon filling relies on both zest and juice, not just one or the other. Zest carries most of the aromatic lemon oils and gives you that bright citrus scent without adding liquid or acidity to the batter, while juice contributes the tartness and a small amount of acid that affects texture. Many bakers also incorporate components like lemon yogurt for extra moisture and a smooth, tangy lift on top of the milder flavour baked into the filling itself.

    As for what to put on top, whipped topping and fresh lemon slices are the classic choices if you want something light and refreshing.

    What Makes Lemon Cheesecake So Good?

    The appeal comes down to contrast. Cream cheese filling is dense and rich on its own; lemon’s sharpness keeps each bite from feeling one-note, which is a big part of why it’s consistently one of the most requested cheesecake flavours at bakeries. It also pairs naturally with other bright, complementary flavours — blueberry and raspberry are the most common fruit pairings, since their tartness echoes lemon’s without clashing, and a light vanilla element rounds it out without competing.

    The common mistakes here aren’t unique to lemon cheesecake — they’re the same issues that affect cheesecake generally: overmixing the batter after the eggs go in, which causes cracks, and overbaking, which leaves the centre dry instead of just barely set. Lemon cheesecake doesn’t forgive those mistakes any more than a plain version does.

    Does Lemon Juice Actually Matter, or Is It Just Flavour?

    It matters beyond flavour. Lemon juice is acidic, and that acidity interacts with the dairy in the filling — in small, controlled amounts, it doesn’t cause any issue, but recipes are specific about quantity because too much acid can affect how the batter sets, sometimes leading to a slightly looser or more delicate texture than a filling without any added acid. Skip the lemon juice entirely and you lose more than flavour — you lose the tartness that balances the richness, leaving a filling that tastes closer to a plain cheesecake with lemon zest sprinkled in rather than a true lemon cheesecake.

    This is also why old-fashioned lemon cheesecake recipes tend to be precise about ratios rather than “add lemon to taste” — the juice is doing double duty as both a flavour component and a structural one.

    What’s the Traditional “Philadelphia” or Old-Fashioned Version?

    As with the other Philadelphia-branded recipes people search for, “Philadelphia lemon cheesecake” generally just refers to a classic recipe built around reliable ingredients rather than a fundamentally different technique. The “old-fashioned” framing usually points to a simpler style than modern layered or swirled versions — a single baked filling with lemon worked directly into the batter, a basic graham crust, and little to no elaborate topping beyond a light whipped topping. It’s the version built on fewer components, letting the lemon and cream cheese speak for themselves rather than competing with additional flavours or textures.

    The Recipe: Classic Baked Lemon Cheesecake

    Lemon Cheesecake

    Lemon Cheesecake

    This creamy baked lemon cheesecake features a smooth cream cheese and lemon yogurt filling inside a graham cracker crust. It is finished with a bright citrus touch and chilled overnight for a refreshing dessert.
    Prep Time 20 minutes
    Cook Time 1 hour
    Total Time 1 hour 20 minutes
    Servings: 12
    Course: Dessert

    Ingredients
      

    • 1 9 inch graham cracker pie crust
    • 2 8 ounce packages cream cheese
    • 1/2 cup white sugar
    • 1 1/2 tablespoons all-purpose flour
    • 2 1/2 tablespoons lemon juice
    • 2 teaspoons lemon zest
    • 2 eggs
    • 1 8 ounce container lemon yogurt

    Method
     

    1. Preheat oven to 350°F (175°C).
    2. In a large mixing bowl, beat cream cheese and sugar until smooth. Gradually add in flour, lemon juice, lemon zest, and eggs, one at a time until just combined. Stir in yogurt. Pour into crust. Place into a baking pan filled with 1 inch of water.
    3. Bake 50 to 60 minutes, until set. Cover, cool, and chill overnight.
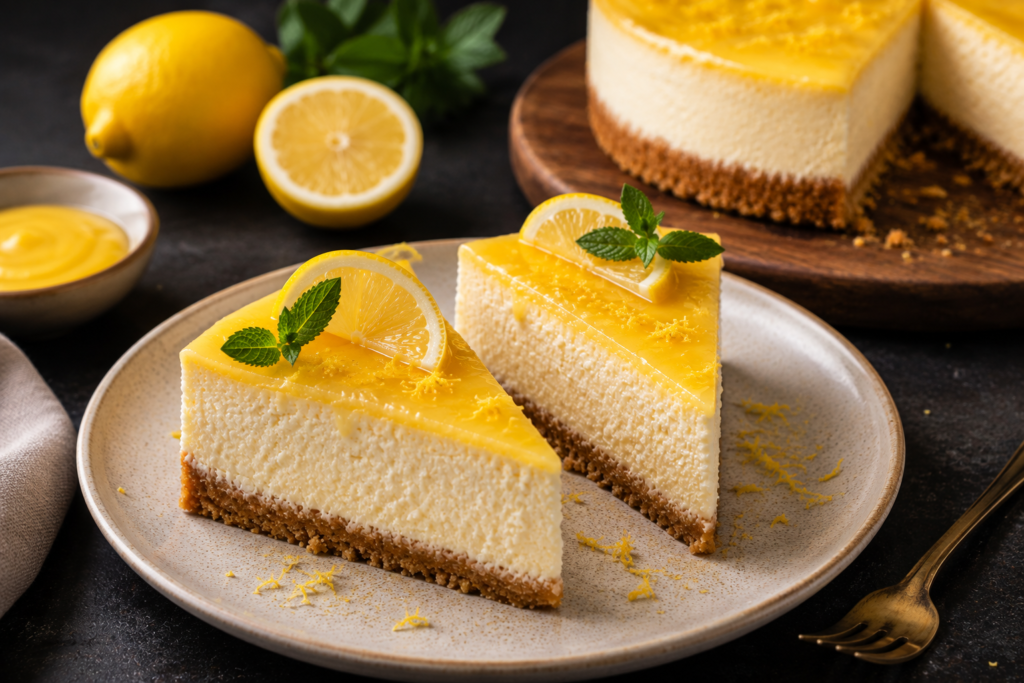
    4. Garnish suggestion: whipped topping and fresh lemon slices.

    Frequently Asked Questions

    • What can you put on a lemon cheesecake? Whipped topping and fresh lemon slices are classic choices, though powdered sugar or fresh berries like blueberries or raspberries all work well too.
    • How do you make lemon filling? Combine lemon zest, juice, flour, eggs, and lemon yogurt into a cream cheese base for a smooth, bright lemon filling.
    • What crust goes best with lemon cheesecake? A classic graham cracker pie crust is the most common and reliable pairing.
    • What is the secret to a good cheesecake? Room-temperature ingredients, minimal mixing once the eggs are added, and a gradual cooldown after baking.
    • What fruit goes best with lemon cheesecake? Blueberries and raspberries are the most common pairings — their tartness complements lemon’s acidity rather than competing with it.
    • What is the original recipe for cheesecake? It generally refers to a classic cheesecake built specifically around standard cream cheese and simple baking techniques rather than a distinct style.
    • What happens if you don’t put lemon juice in cheesecake? You lose the tartness that balances the richness of the cream cheese, and you also lose the small structural effect the acidity has on how the filling sets — the result tastes closer to plain cheesecake with a hint of zest than true lemon cheesecake.

    Final Thoughts

    Lemon cheesecake has stayed a classic for a reason — the acidity does real work balancing the richness, not just adding flavour on top. Whether you keep it simple with lemon and yogurt worked into the batter, the fundamentals are the same ones that make any cheesecake succeed: proper mixing, a water bath, and patience while it chills.

    Give it a try this week, and if your filling cracks or doesn’t set, leave a comment — I’ll help you troubleshoot exactly where it went off track.

    Caramel Cheesecake: A Pastry Chef’s Guide to Getting the Caramel Right (Homemade or Shortcut)

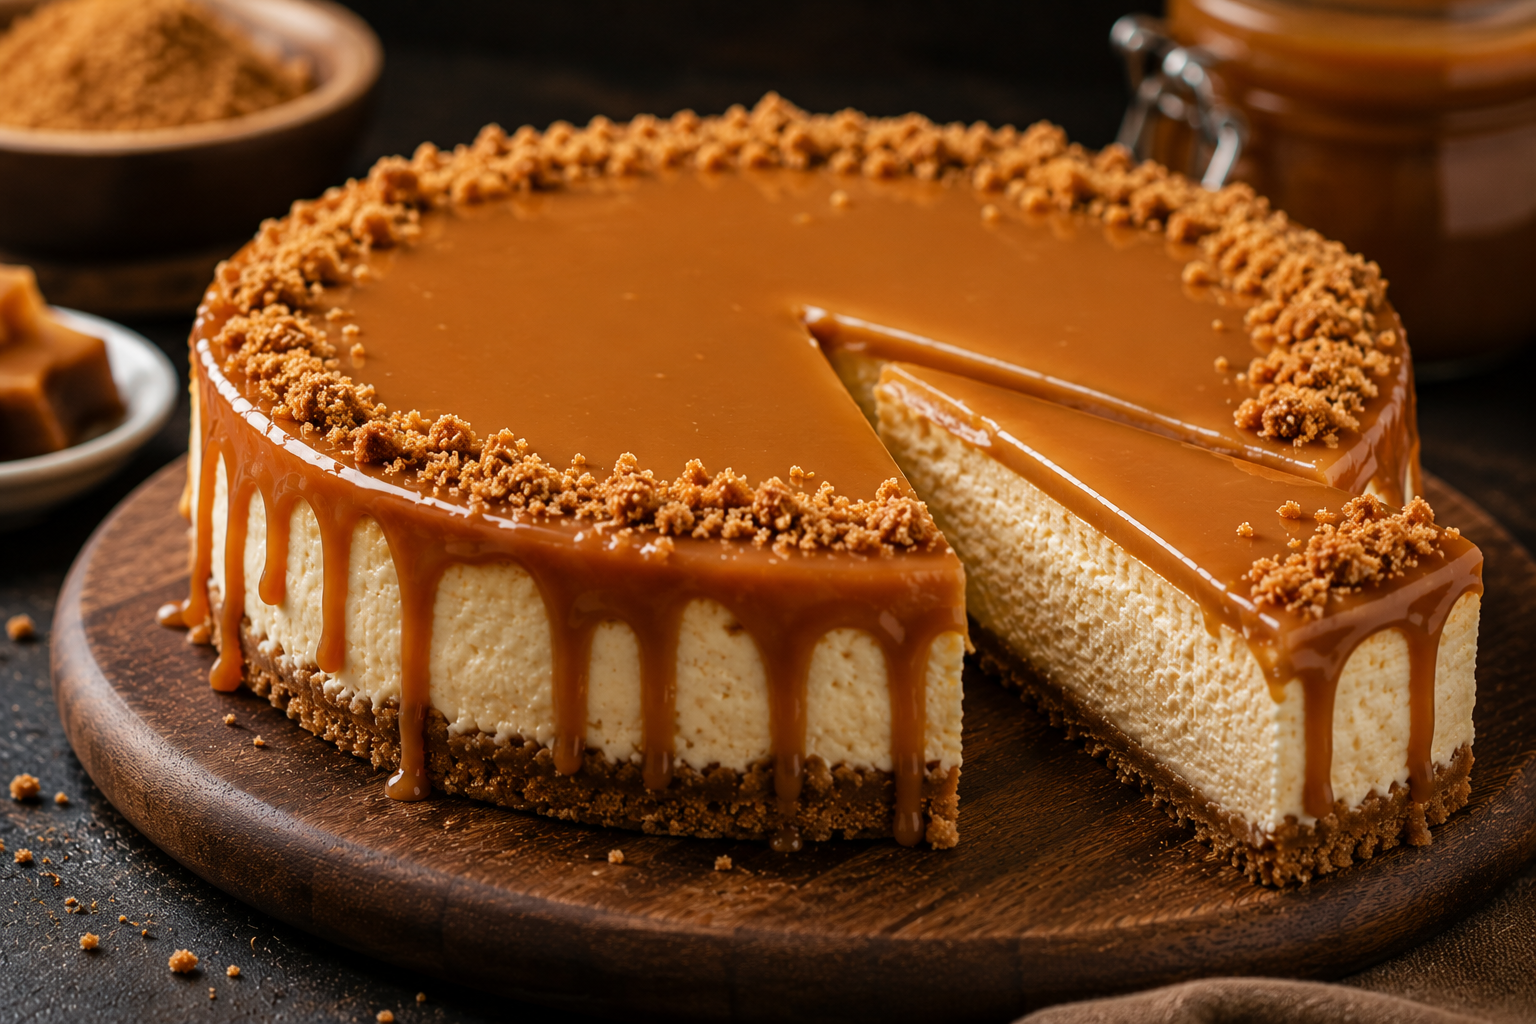
    Caramel Cheesecake

    Caramel cheesecake succeeds or fails on one thing more than any other: the caramel itself. Get a smooth, properly emulsified caramel, and the cheesecake underneath barely needs to compete for attention. Get a grainy, split, or overly stiff caramel, and no amount of technique on the cheesecake base will save the slice. That’s why most of the real questions people have about this dessert aren’t about the cheesecake at all — they’re about caramel-making, and specifically, when it’s fine to reach for a canned shortcut instead of making it from scratch.

    As a pastry chef, I get asked constantly about the order you add ingredients when making caramel, whether milk works as a cream substitute, and whether canned caramel — Carnation caramel being the most common brand people ask about — is a legitimate shortcut or a compromise. This guide covers all of it, then walks you through a full recipe using both approaches.

    Key Takeaways

    • Caramel-making order matters: butter goes in before cream, not the other way around, to avoid seizing.
    • Milk can replace cream in caramel, but it produces a thinner, less stable result that won’t set as firmly.
    • Canned caramel (like Carnation) is a legitimate, widely used shortcut for cheesecake toppings — it sets softer than homemade caramel unless slightly reduced.
    • Caramel added to a warm base too early can split or thin out; it’s usually salvageable by cooling both components before combining.
    • Full recipe and an FAQ built from real reader questions are below.

    How Do You Make a Simple Caramel Cheesecake?

    The simplest version relies on store-bought caramel rather than cooking your own sugar syrup — swirl or layer a canned caramel like Carnation directly into a basic cream cheese filling, and you get real caramel flavour without the risk of a scorched or seized batch. For a truly minimal version, some recipes get down to essentially three components: cream cheese, canned caramel, and a pre-made crust, with the caramel doing double duty as both flavour and sweetener.

    Whether you make your own caramel or use canned, the two combine the same way: caramel folds into cream cheese filling far more smoothly when both are close to room temperature. Cold caramel straight from the fridge tends to clump rather than blend evenly.

    Can You Mix Caramel with Cream Cheese?

    Yes, and it’s one of the more forgiving flavour combinations in cheesecake — cream cheese’s tang balances caramel’s sweetness in the same way it does with fruit. The main technical question people run into is caramel-making itself, not the mixing step. A few points worth knowing if you’re making your own:

    • Butter goes in before cream, not after. Adding butter to your melted sugar first, then cream once the butter is fully incorporated, helps prevent the mixture from seizing into a hard, grainy mass.
    • Milk can replace cream, but the result is thinner. Cream’s higher fat content is what gives caramel its rich body and helps it set to a spreadable consistency. Milk-based caramel stays looser and won’t firm up the same way once cooled, which matters if you’re using it as a layer inside a cheesecake rather than a drizzle on top.
    • Condensed milk works as a shortcut for a specific style. Simmering a can of sweetened condensed milk (or using a pre-made dulce de leche) gives you a thick, already-sweetened caramel without cooking sugar from scratch — closer to Carnation caramel’s texture than a classic cream-based caramel.
    • If you’ve already added cream to your caramel too early — before the sugar fully melted, or while the mixture was still too hot — it often looks broken or grainy rather than smooth. In most cases, gently reheating the mixture over low heat while whisking continuously will bring it back together; a hand blender can help re-emulsify a stubborn batch if whisking alone doesn’t fully smooth it out.

    Is Carnation Caramel a Good Shortcut?

    Yes — Carnation caramel (the canned, ready-made caramel widely available in Canadian grocery stores) is a legitimate shortcut used in everything from banoffee pie to cheesecake toppings, not just a lesser substitute for homemade. Straight from the can, it’s softer and more spoonable than a stovetop caramel cooked to a firmer set, which is exactly why it works well swirled through a filling but needs a bit of help if you want it to hold a firmer layer on top.

    If you want it to set harder — for a cleaner caramel layer rather than a soft swirl — gently simmering the canned caramel for a few extra minutes to reduce some of the moisture before chilling will firm it up. Used straight from the can without reducing, it stays soft and glossy, which is ideal for swirling but won’t hold a sharp-edged layer the way a cooked-down version will.

    When Should You Put Caramel on Top of Cheesecake?

    Always after the cheesecake has fully cooled and set — adding caramel while the cheesecake is still warm causes it to run off the sides rather than sit as a defined layer. If you’re using canned caramel straight from the fridge, let it come to room temperature first so it spreads evenly rather than tearing the surface of the chilled cheesecake underneath.

    As for whether cheesecake deserves its reputation as an unhealthy dessert — that’s more about rich, calorie-dense desserts in general than cheesecake specifically. A caramel topping adds sugar on top of an already rich base, so portion size matters more here than with a plainer cheesecake, but one slice isn’t going to have an outsized effect on its own.

    The Recipe: Baked Caramel Cheesecake

    Caramel Cheesecake

    Caramel Cheesecake

    Flavor & Style: A decadent baked caramel cheesecake featuring a spiced graham cracker and margarine crust, a rich cream cheese and dulce de leche filling, and a golden finish.
    Yield & Sizing: Designed to make 12 servings.
    Timing: Requires a total preparation time of 4 hours and 15 minutes, along with 1 hour and 5 minutes of total cooking time (including initial high-heat baking followed by reduced-heat baking), plus at least 4 hours of chilling time before serving cold.
    Prep Time 4 hours 15 minutes
    Cook Time 1 hour 5 minutes
    Total Time 5 hours 20 minutes
    Servings: 12
    Course: Dessert

    Ingredients
      

    Crust:
    • cup margarine melted
    • ¼ teaspoon ground cinnamon
    • 1 ½ cups graham cracker crumbs
    Filling:
    • 2 teaspoons vanilla extract
    • 4 8-ounce packages cream cheese, softened
    • ½ cup sour cream
    • 5 large eggs
    • 1 cup Dulce de Leche
    • 1 ¼ cups white sugar

    Method
     

    1. Preheat oven to 475°F & place a skillet with half an inch of water inside.
    2. Combine the ingredients for crust in a bowl. Line a large pie pan with parchment paper and spread crust onto pan. Press firmly. Cover it with foil & keep it in the freezer until ready to use.
    3. Combine all for filling apart from the eggs in a bowl. Mix in eggs 1 at a time & beat until fully blended.
    4. Remove the crust & pour in the filling, spreading it evenly. Place the pie pan into the heated skillet in the oven and bake for about 12 minutes.
    5. Reduce the heat to 350°F. Continue to bake for about 50 minutes, or until the top of the cake is golden. Remove it from the oven & move the skillet onto a wire rack to cool.
    6. Refrigerate for at least 4 hours.
    7. Serve cold.

    Frequently Asked Questions

    • What is the 3-ingredient cheesecake? A stripped-down version using cream cheese, canned caramel, and a pre-made crust, skipping eggs and baking entirely for a no-bake result.
    • Can you mix caramel with cream cheese? Yes — the tang of cream cheese balances caramel’s sweetness well; just make sure both are close to room temperature so they combine smoothly.
    • What does adding milk to caramel do? It produces a thinner caramel that won’t set as firmly as one made with cream, since cream’s higher fat content is what gives caramel its body.
    • Do you add butter or cream first when making caramel? Butter first — adding it before the cream helps prevent the caramel from seizing into a grainy mass.
    • What happens if you use milk instead of cream in caramel? You get a looser, less stable caramel that stays soft rather than firming up on cooling.
    • Can you use Carnation caramel on top of cheesecake? Yes — it’s a common, reliable shortcut, though it’s softer straight from the can and benefits from a brief simmer if you want it to set into a firmer layer.
    • Will Carnation caramel set hard? Not straight from the can — it stays soft and spoonable. Simmering it briefly to reduce moisture before chilling will firm it up.
    • I added cream to caramel too early. What should I do? Gently reheat the mixture over low heat while whisking continuously to bring it back together; a hand blender can help if whisking alone doesn’t fully smooth it out.
    • Can you use condensed milk instead of cream for caramel? Yes — simmering condensed milk produces a thick, already-sweetened caramel similar in texture to dulce de leche or canned caramel.

    Final Thoughts

    Caramel cheesecake really comes down to respecting the caramel — whether you’re cooking your own from scratch or reaching for a can of Carnation, the technique that matters most is temperature: warm enough to blend smoothly, cool enough not to melt into the filling. Get that right, and the rest of the cheesecake is standard technique you likely already know.

    Try the recipe this week, and if your caramel splits or won’t set, leave a comment — I’ll help you figure out exactly where it went off track.

    Mango Cheesecake: A Pastry Chef’s Guide to the Classic Baked Version Worth Making

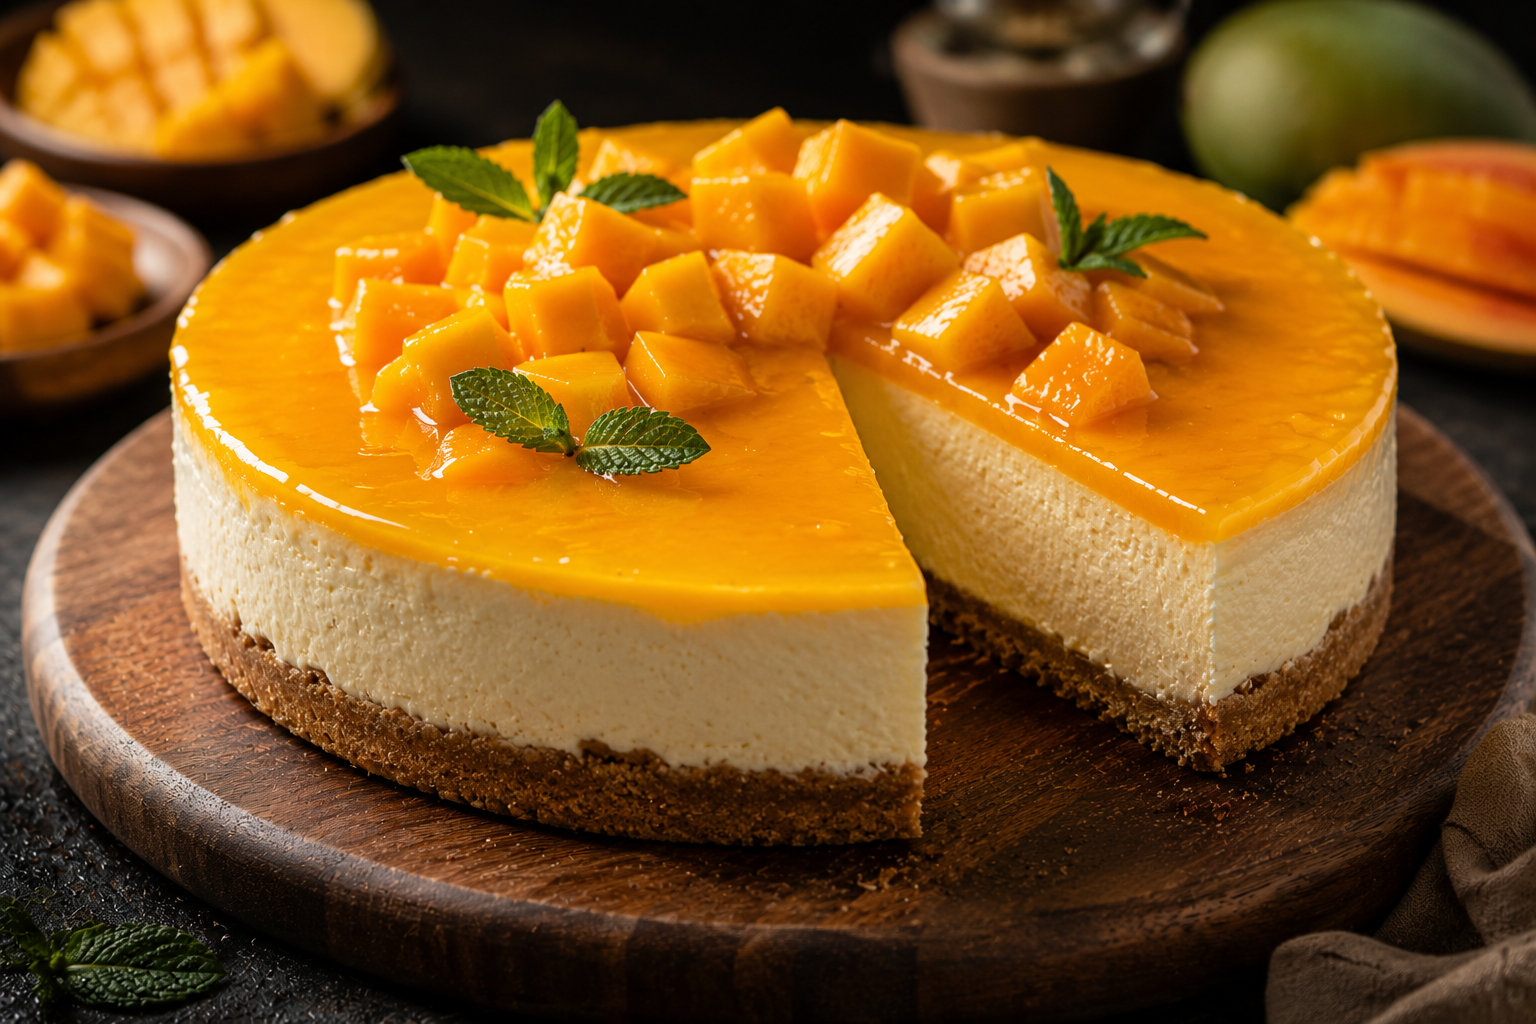
    Mango Cheesecake

    Mango and cream cheese might not seem like an obvious pairing on paper, but it works for the same reason strawberry or lemon cheesecake works — tropical sweetness against a tangy, rich base. What sets mango apart is how forgiving it is: it doesn’t need much sugar to shine, and it purées into a silky texture that blends beautifully into a rich baked filling.

    As a pastry chef, most of the questions I hear about this dessert come down to practical choices — does mango actually work here, what’s the best variety to use, can it be pulled off with a traditional baked method, and does it play nicely with Philadelphia-brand cream cheese specifically. This guide covers all of it, then walks you through a full baked recipe.

    Key Takeaways

    • Mango and cream cheese pair well because mango’s tropical sweetness balances cream cheese’s tang, the same principle behind most fruit cheesecakes.
    • Ataulfo mangoes (sometimes called honey or champagne mangoes) are widely available and are the best choice for cheesecake thanks to their smooth, fibre-free flesh.
    • A classic baked mango cheesecake relies on a proper thermal set using eggs, cream cheese, and a graham cracker crust baked at a moderate temperature.
    • Cream cheese brand doesn’t affect whether mango works as a flavour; Philadelphia is simply a reliable, widely used choice, not a requirement.
    • Full recipe and an FAQ built from real reader questions are below.

    Does Mango Actually Go Well with Cheesecake?

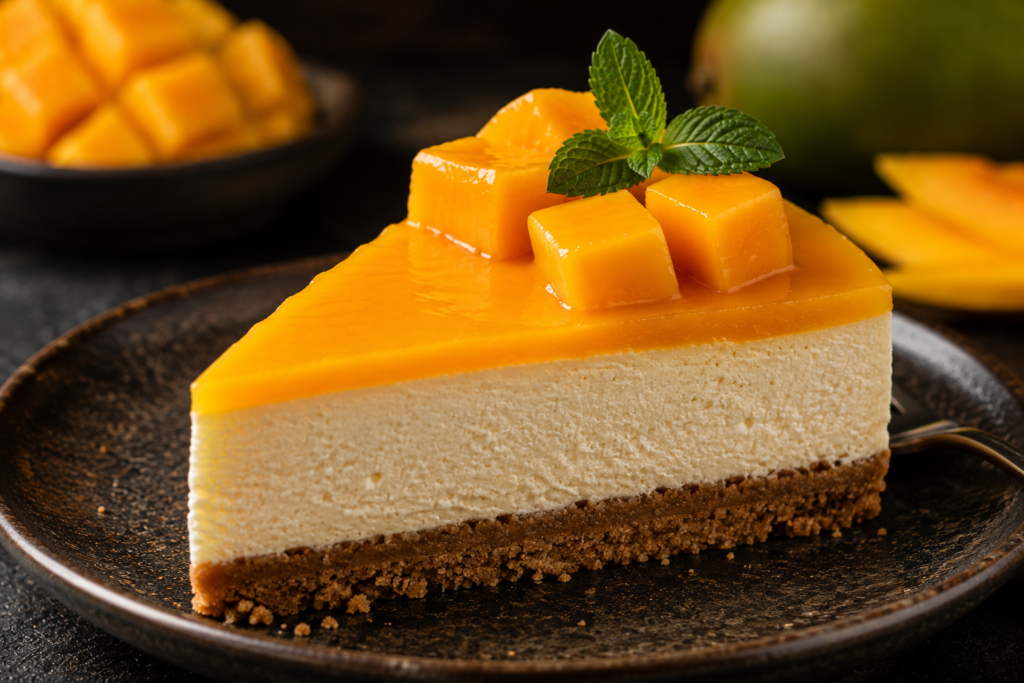
    Yes, and it’s one of the more natural fruit pairings for cheesecake, not just a trendy addition. Mango brings a soft, tropical sweetness with just enough acidity to cut through cream cheese’s richness, similar to how strawberry or raspberry works, but with a smoother, less tart edge. Because ripe mango purées so easily into a smooth consistency, it blends into a cheesecake filling more seamlessly than fruits that need to be strained or cooked down first.

    The most common way to incorporate it is puréed directly into the filling for a fully mango-flavoured cheesecake, though swirling purée through a plain filling or layering fresh mango on top are both popular alternatives if you want the fruit flavour more pronounced in certain bites rather than throughout.

    mango cheesecake

    What’s the Secret to the Best Mango Cheesecake?

    The biggest factor isn’t a hidden technique — it’s mango ripeness. Underripe mango is fibrous and tart, and no amount of sugar fully compensates for that where the fruit isn’t cooked down. A properly ripe mango, by contrast, purées smooth and brings enough natural sweetness that you can often let its natural flavour shine.

    As for variety, not all mangoes behave the same way in a cheesecake. Ataulfo mangoes — sometimes labelled honey or champagne mangoes — have a smooth, nearly fibre-free flesh that purées cleanly, which makes them the better choice over fibrous varieties that can leave a stringy texture in the final filling.

    The mistakes that come up most with mango cheesecake are the same ones that affect baked cheesecakes generally: overmixing the filling (which incorporates too much air and causes cracking), baking at too high a temperature, and rushing the chill time, which leaves the filling too soft to slice cleanly.

    Do Mango and Cream Cheese Go Together — And What Shouldn’t You Pair With It?

    Mango and cream cheese are a well-established pairing, and it doesn’t matter which cream cheese brand you use — Philadelphia works fine here, but so does any full-fat block-style cream cheese; the brand affects consistency more than flavour compatibility. Beyond cream cheese, mango pairs naturally with coconut, lime, vanilla, and ginger, which is why mango-coconut or mango-lime combinations show up so often in tropical desserts.

    What doesn’t work as well is pairing mango with very acidic or bitter flavours that compete rather than complement — think strong dark chocolate or heavily bitter citrus pith — since they tend to fight mango’s soft sweetness instead of balancing it the way a mild tang or subtle spice does.

    The Recipe: Baked Mango Cheesecake

    Mango Cheesecake

    Mango Cheesecake

    Flavor & Style: A rich, creamy baked mango cheesecake made with a graham cracker crust and real, ripe mango puree folded into the filling.
    Yield & Sizing: Designed for a 9-inch springform pan, yielding about 12 slices.
    Timing: Takes 12 minutes to bake the crust, 75 to 85 minutes for the cheesecake to bake, and requires overnight chilling in the refrigerator before serving.
    Servings: 12 slices
    Course: Dessert

    Ingredients
      

    CRUST:
    • 1 1/2 cups graham cracker crumbs
    • 1/2 cup sugar
    • 6 tablespoons unsalted butter melted
    FILLING:
    • 2 large very ripe mangoes, peeled, pitted, pureed
    • 3 8- ounce packages cream cheese room temperature
    • 1 1/4 cups sugar
    • 2 teaspoons vanilla extract
    • 4 large eggs

    Method
     

    1. Preheat oven to 325°F (165°C).
    2. In a medium bowl, combine graham cracker crumbs, sugar, and butter. Press into the bottom of a greased 9-inch springform pan. Bake for 12 minutes.
    3. In a large mixing bowl, beat together cream cheese, sugar, and vanilla until smooth. Add in eggs, one at a time, beating well after each addition. Add in mango puree and mix until well combined. Pour into crust.
    4. Bake 75 to 85 minutes, until the center is almost set. Cool, cover, and chill overnight.
    5. Garnish suggestion: fresh mango wedges.

    Frequently Asked Questions

    • What fruit goes best with cheesecake? There’s no single best fruit, but mango, strawberry, and raspberry are among the most reliable pairings thanks to their natural balance of sweetness and acidity.
    • How do you make cheesecake with mango? Purée ripe mango and fold it into a cream cheese base, either baked or no-bake — baked versions use eggs and a moderate oven temperature for a traditional, velvety structure.
    • What are some tips for making mango cheesecake? Use fully ripe mango, make sure your cream cheese is at room temperature to avoid lumps, and don’t rush the chill time — the cheesecake needs overnight refrigeration to set properly.
    • What are the key ingredients in mango cheesecake? Cream cheese, ripe mango purée, sugar, eggs, vanilla, and a graham cracker crust.
    • What cheese goes well with mango? Cream cheese is the classic match for desserts; mango also pairs well with mild, fresh cheeses like ricotta or mascarpone in other contexts.
    • Can you make mango cheesecake with Philadelphia cheese? Yes — Philadelphia is a reliable, widely available full-fat cream cheese and works well here, though any block-style full-fat cream cheese performs similarly.
    • Which mango is best for cheesecake? Ataulfo (honey or champagne) mangoes are the top choice — their smooth, nearly fibre-free flesh purées cleanly, unlike more fibrous varieties.
    • What shouldn’t you pair with mango? Very bitter or heavily acidic flavours, like intense dark chocolate or citrus pith, tend to compete with mango’s sweetness rather than complement it.

    Final Thoughts

    Mango cheesecake earns its place alongside the classic fruit versions — it just asks for one thing the others don’t demand as strictly: genuinely ripe fruit. Get that right, choose a smooth variety like Ataulfo, use the traditional baked method outlined above, and let it chill overnight for a masterpiece dessert.

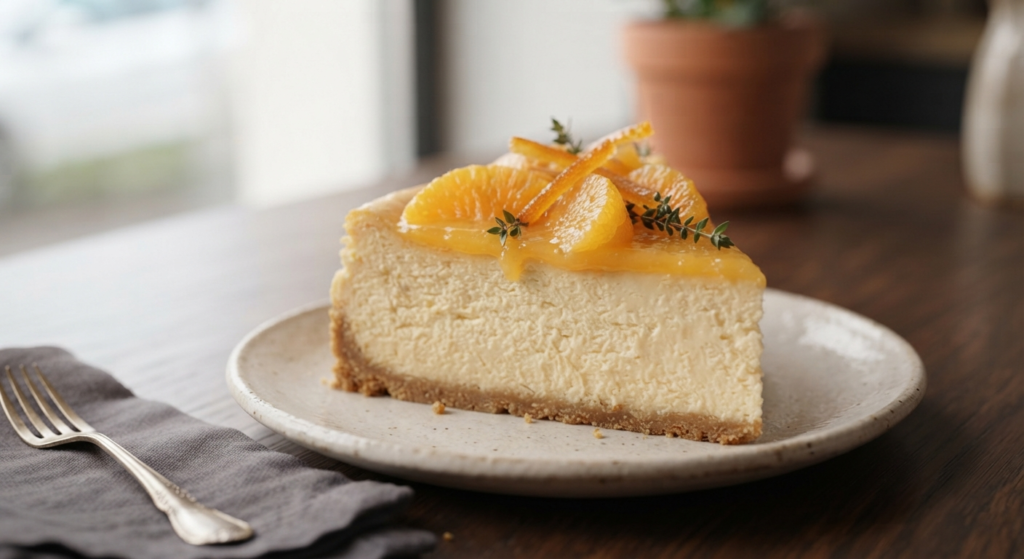
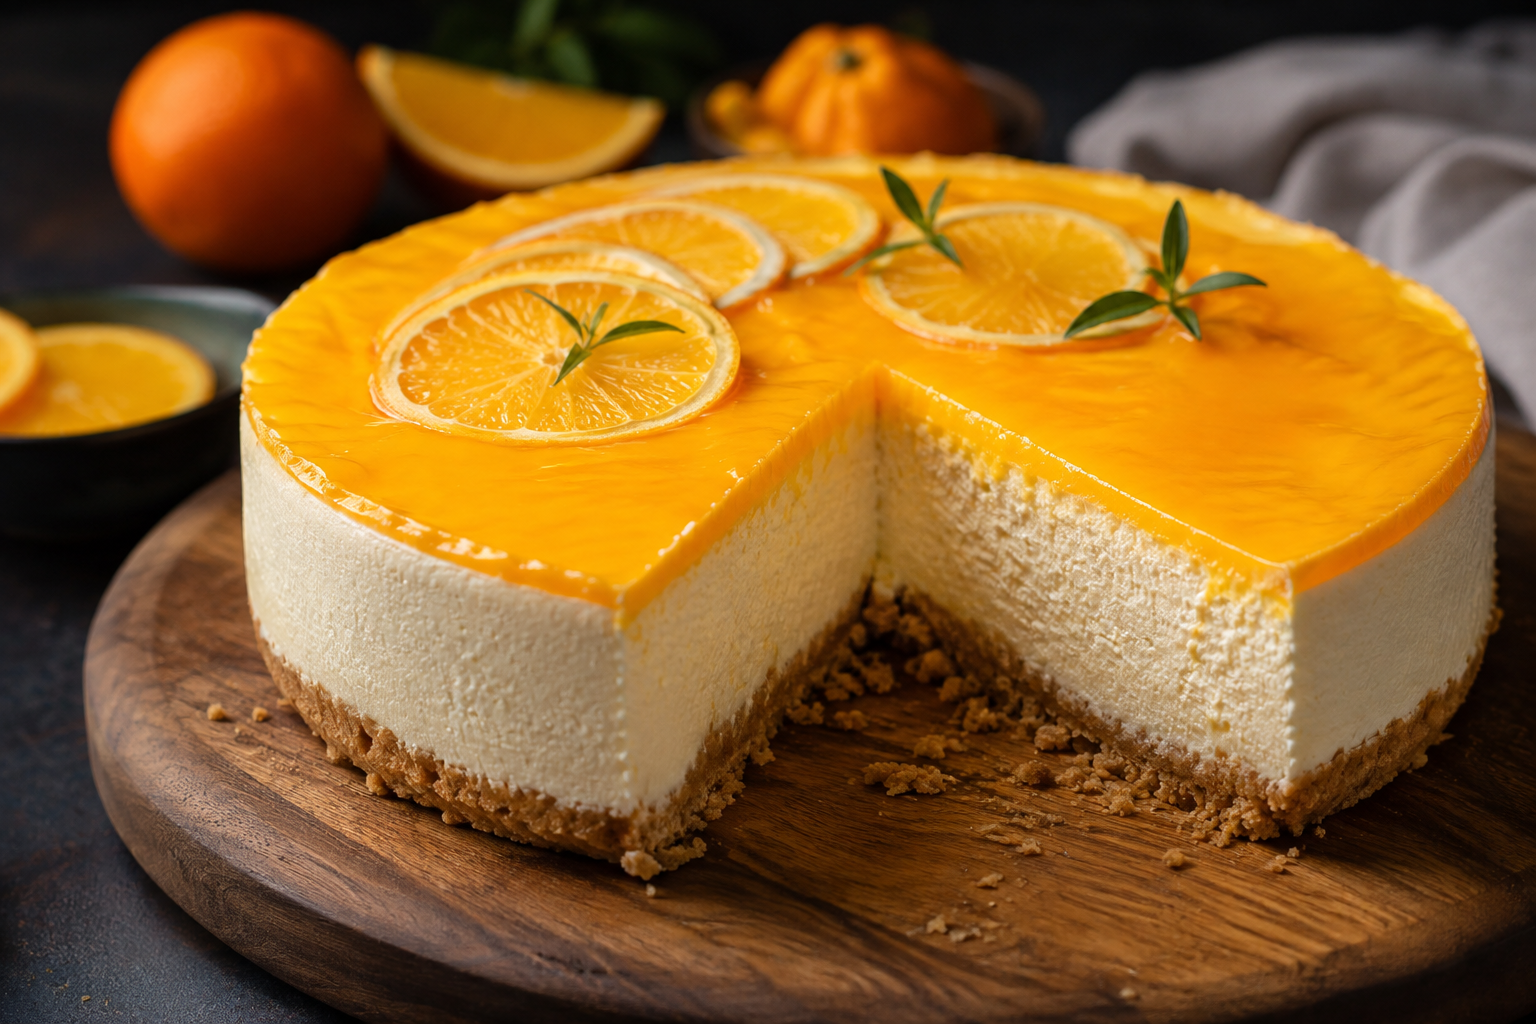
    Orange Cheesecake: A Pastry Chef’s Guide to Nailing This Creamsicle-Style Classic

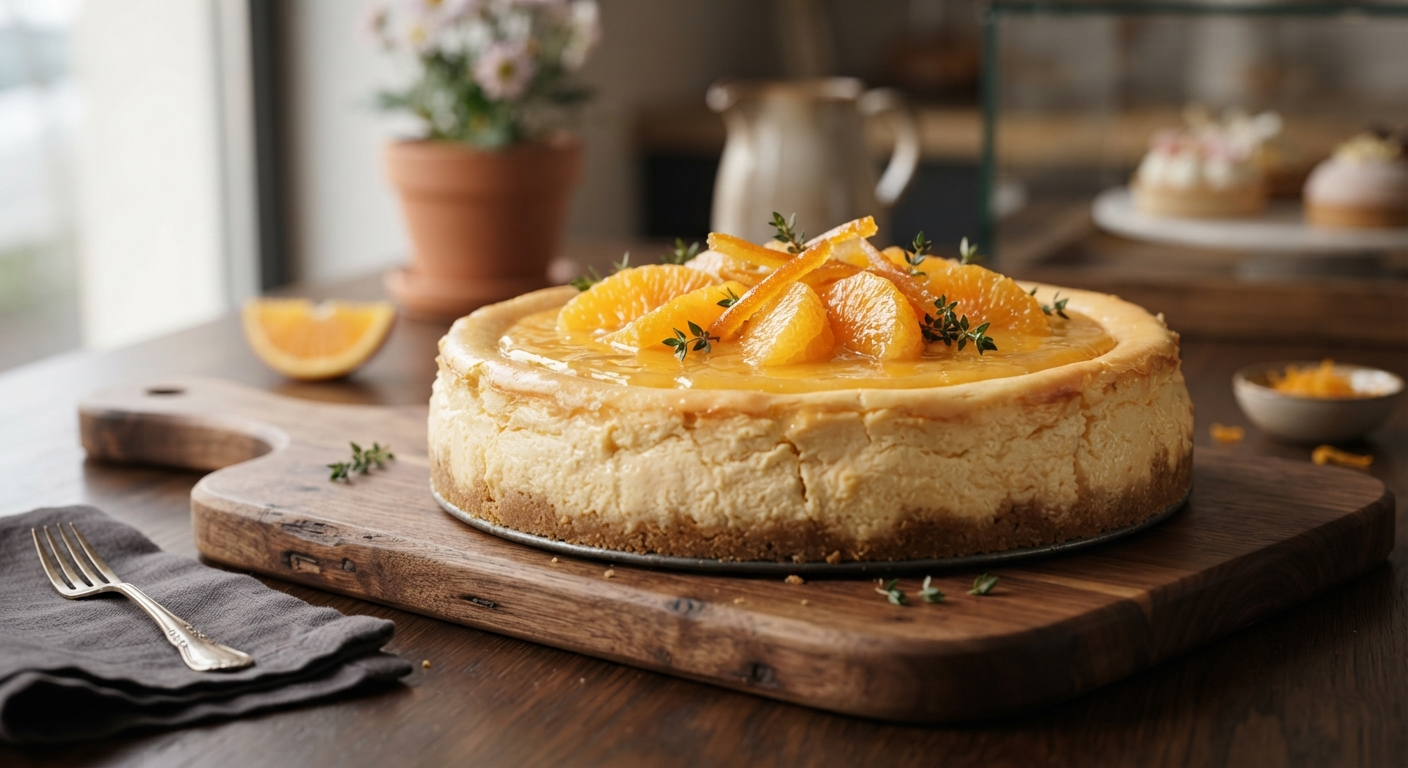
    Orange Cheesecake
    Orange Cheesecake

    Orange doesn’t get the same spotlight as lemon or lime in the cheesecake world, but it deserves more credit than it gets. Where lemon leans sharp and lime leans tart, orange brings something softer and sweeter — closer to a creamsicle than a punch of citrus. Built on a classic cream cheese base, orange cheesecake gives you that familiar dense, rich texture with just enough brightness to keep it from feeling heavy, which is exactly why it shows up so often at Toronto bakeries once orange season hits.

    As a pastry chef, most of the questions I get about this dessert aren’t really about orange at all — they’re about cheesecake technique in general: what makes cheesecake genuinely hard to get right, the most common ways it goes wrong, and what people mean when they ask for a “Philadelphia” cheesecake specifically. This guide covers all of that, then gives you our precise tested recipe.

    Key Takeaways

    • Cheesecake has a reputation for being difficult that’s mostly about a few specific failure points — temperature control, mixing, and cooling — not the recipe itself.
    • “Philadelphia cheesecake” typically just means a recipe built specifically around Philadelphia-brand cream cheese, prized for its consistent texture.
    • Most cheesecake fixes (cracks, not setting, dense texture) trace back to the same three culprits every time.
    • Orange creamsicle cheesecake balances vanilla and fresh orange zest against the tang of cream cheese and sour cream.
    • Full recipe and an FAQ from real reader questions are below.

    What’s the Best Recipe for Orange Cheesecake?

    The best version leans into orange’s natural sweetness rather than fighting it with too much acidity. Unlike lemon or lime cheesecakes, which typically rely on a large volume of juice to carry the flavour, a good orange cheesecake usually gets most of its punch from fresh zest, with juice and sour cream balancing the texture nicely. That’s the difference between an orange cheesecake that tastes like dessert and one that tastes like it’s trying too hard to be a lemon cheesecake with different fruit.

    If you’re chasing the “best cheesecake recipe ever” in a general sense, the answer isn’t really about a specific formula — it’s about nailing the handful of technique points that separate a bakery-quality slice from a home attempt that cracks or sinks in the middle. That’s worth walking through before you even get to the orange-specific details.

    What Actually Makes Cheesecake Hard to Make?

    Cheesecake has a reputation as one of the more difficult desserts, and it’s earned — but not for the reason most people assume. It’s not a complicated ingredient list or technique; it’s that cheesecake is unusually sensitive to small mistakes compared to a typical cake. A few degrees too hot, a minute too long in the oven, or too much air beaten into the batter, and you’ll see it in cracks or a sunken centre. Cake batter is forgiving of imprecision in a way that a custard-based filling simply isn’t.

    That sensitivity is also why cheesecake gets called one of the “hardest” or most technically demanding desserts in general baking conversations — it rewards careful technique more than creativity, which trips people up if they’re used to cake recipes where being slightly off doesn’t show.

    What Are the Most Common Cheesecake Mistakes?

    Nearly every cheesecake problem comes down to one of a few repeat offenders:

    • Overmixing after the eggs go in. This beats in extra air, which expands in the oven and collapses on cooling — the leading cause of cracks.
    • Overbaking. Baking until it looks fully set in the oven usually means it’s already overdone.
    • A cheesecake that won’t set. This is almost always either underbaking, not chilling long enough afterward, or using low-fat cream cheese, which doesn’t hold structure the way full-fat does.
    • A dense, heavy texture instead of light and airy. Usually caused by cold ingredients that don’t blend smoothly.

    If your cheesecake has already failed — cracked, sunk, or didn’t set — it’s rarely a total loss. A cracked top can be covered with a fruit topping or whipped cream; a cheesecake that didn’t fully set can sometimes be rescued by chilling it longer, or repurposed as a parfait-style dessert layered with crumbled crust and fruit instead of served as clean slices.

    Orange Cheesecake

    Orange Cheesecake

    Prep Time 4 hours 15 minutes
    Cook Time 1 hour 15 minutes
    Total Time 5 hours 30 minutes
    Servings: 12
    Course: Dessert

    Ingredients
      

    For the Crust:
    • cup margarine melted
    • ¼ teaspoon ground cinnamon
    • 1 ½ cups graham cracker crumbs
    For the Filling:
    • ½ cup sour cream
    • 4 8-ounce packages cream cheese, softened
    • 2 teaspoons vanilla extract
    • 1 ¼ cups white sugar
    • Zest of 2 oranges
    • 5 large eggs

    Method
     

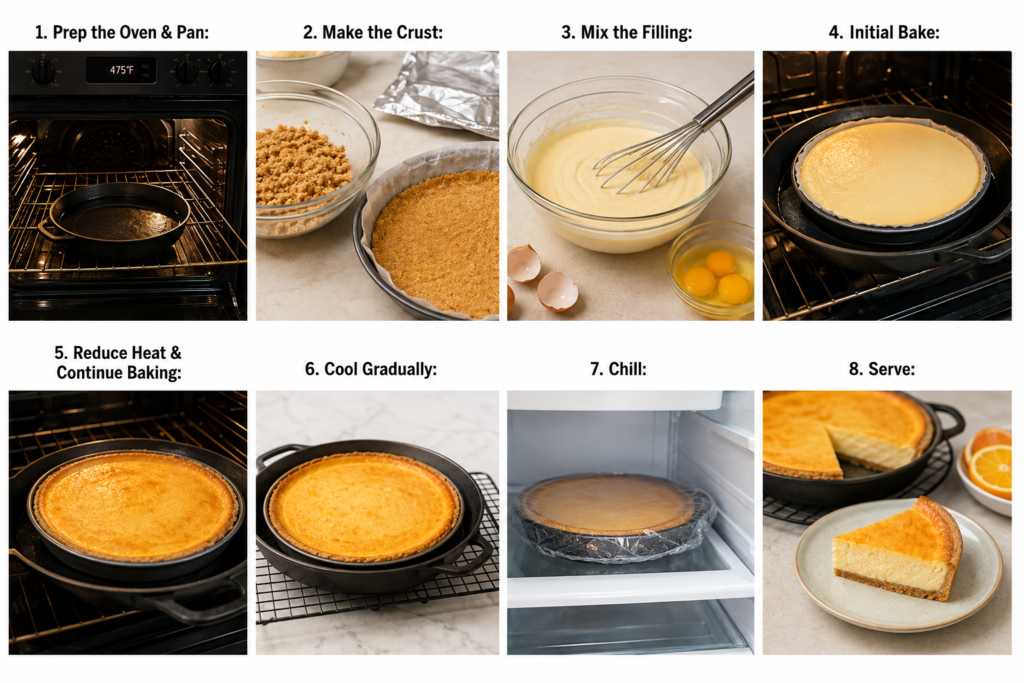
    1. Prep the Oven & Pan: Preheat oven to 475°F (246°C) and place a skillet with half an inch of water inside the oven.
    2. Make the Crust: Combine the ingredients for the crust in a bowl. Line a large pie pan with parchment paper and spread the crust onto the pan, pressing it firmly. Cover it with foil and keep it in the freezer until ready to use.
    3. Mix the Filling: Combine all the ingredients for the filling apart from the eggs in a bowl and mix well. Add in the eggs one at a time and beat until fully blended.
    4. Initial Bake: Remove the crust from the freezer and pour in the filling, spreading it evenly. Place the pie pan into the heated skillet in the oven and bake for about 12 minutes at 475°F.
    5. Reduce Heat & Continue Baking: Reduce the heat to 350°F (175°C). Continue to bake for about 50 minutes, or until the top of the cake is golden.
    6. Cool Gradually: Remove it from the oven and carefully move the skillet onto a wire rack to cool.
    7. Chill: Refrigerate for at least 4 hours.
    8. Serve: Serve cold and enjoy!
    Orange cheesecake directions

    Frequently Asked Questions

    • What’s the hardest cheesecake to make? There’s no single hardest recipe — cheesecake in general is technically demanding because it’s unusually sensitive to overmixing, overbaking, and rapid cooling.
    • What makes cheesecake hard to make? Its custard-like structure has very little margin for error compared to standard cake batter.
    • What is the secret to a good cheesecake? Room-temperature ingredients, minimal mixing once the eggs are added, and a controlled cooling process.
    • Why use a skillet with water in the oven? It creates a gentle moisture environment (a water bath method) that helps the cheesecake bake evenly and prevents surface cracking.
    • How can I make a light and airy cheesecake? Use room-temperature ingredients so the batter blends smoothly without incorporating excess air.

    Final Thoughts

    Orange cheesecake doesn’t need any special technique beyond what makes any great cheesecake work — room-temperature ingredients, gentle mixing, and proper chilling. The orange creamsicle profile gives you a wonderfully sweet, soft citrus note that stands out from the usual lemon or lime options.

    Give the recipe a try this week, and if your centre cracks or won’t set, leave a comment — I’ll help you figure out exactly which step needs adjusting!

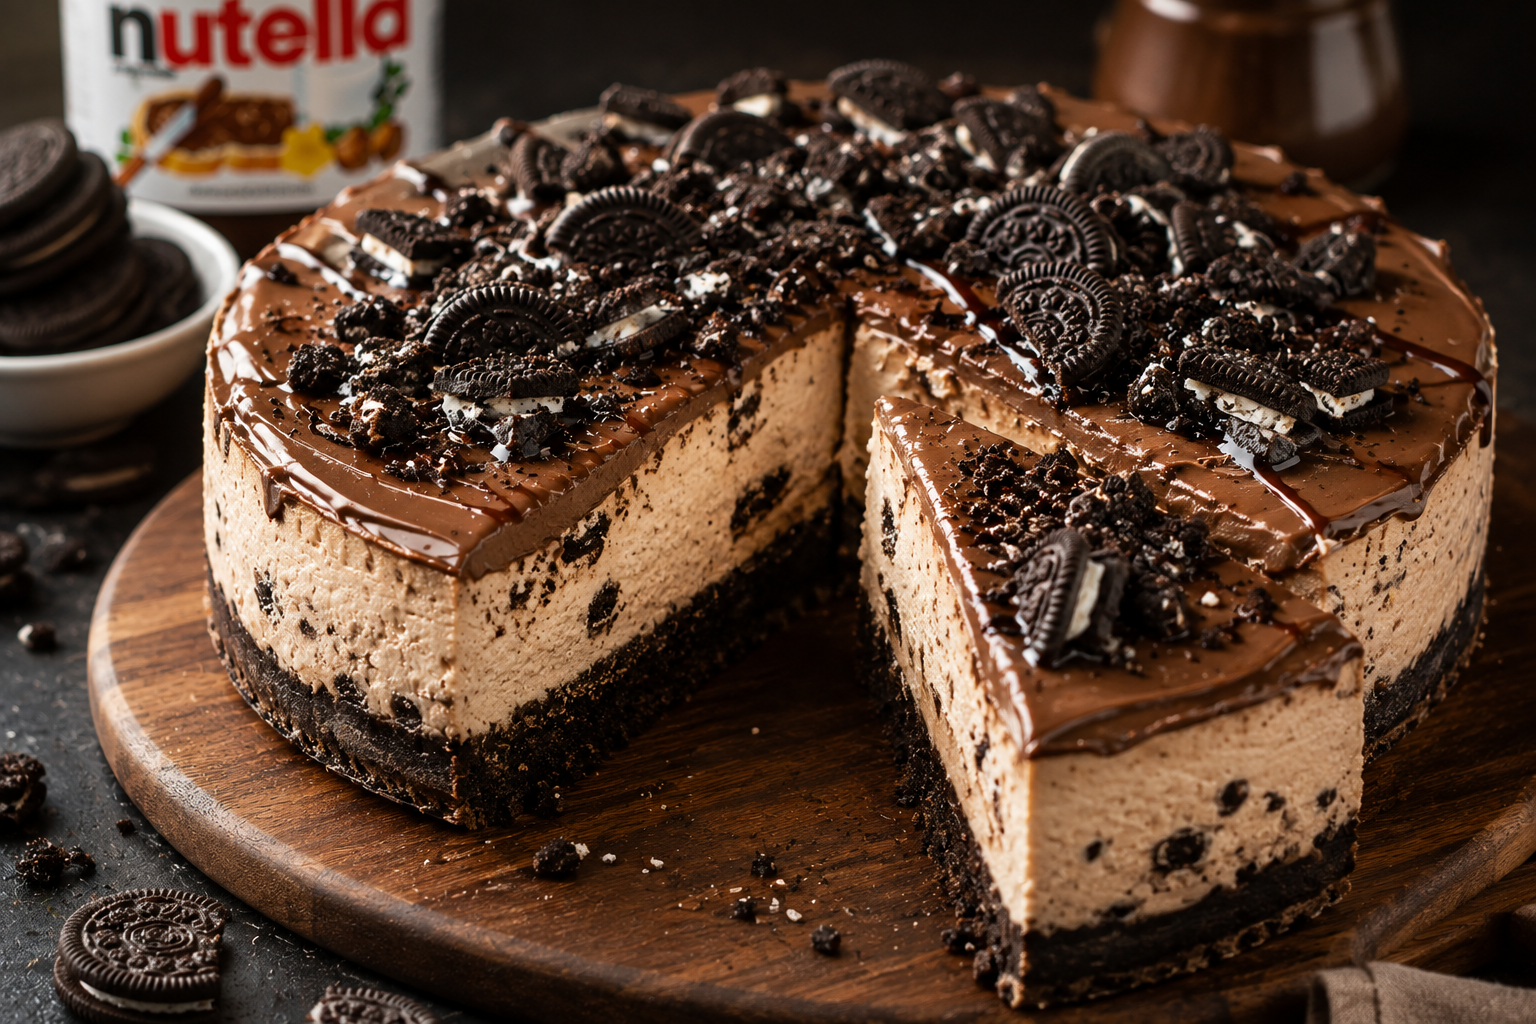
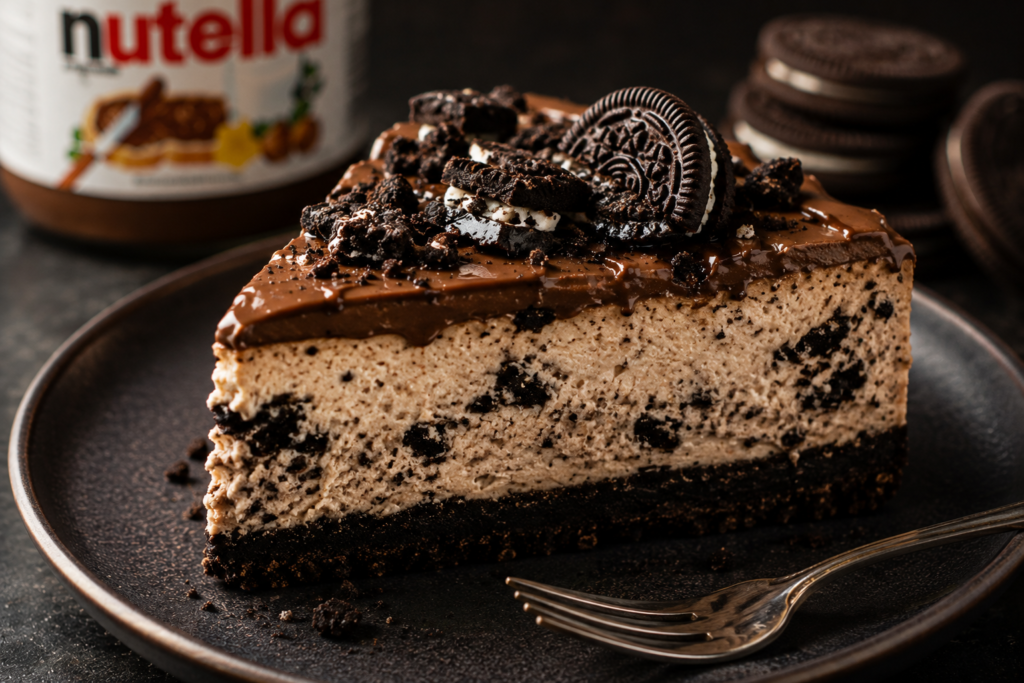
    Nutella Oreo Cheesecake: A Pastry Chef’s Guide to the Baked Version

    Nutella Oreo Cheesecake
    Nutella Oreo Cheesecake

    Nutella and Oreo is one of those pairings that doesn’t need much convincing — hazelnut and chocolate on one side, chocolate cookie crunch on the other. Turn it into a cheesecake and you get something that feels indulgent without needing a complicated process. While no-bake versions are popular, baking a Nutella cheesecake gives it a wonderfully rich, dense structure when handled correctly.

    As a pastry chef, the questions I get about this one are fairly practical — does the flavour pairing actually work, how do you keep the Nutella from separating in the oven, and what’s the best way to handle a smaller 6-inch springform pan. This guide covers it all, then walks you through the precise recipe.

    Key Takeaways

    • Nutella and Oreo genuinely complement each other — hazelnut-chocolate pairs naturally with a chocolate cookie crunch.
    • Baking Nutella requires care to avoid separation, which is solved here by gently warming it with milk and blending it into a rich custard base.
    • Oreos make an excellent cheesecake base, crushed and bound with butter just like a traditional graham crust.
    • Full recipe yields, precise timings, and an FAQ pulled from real reader questions are below.

    Do Oreo and Nutella Actually Go Together?

    Yes, and it’s not just a trendy pairing — the flavours are built to complement each other. Nutella’s dominant notes are roasted hazelnut and cocoa, both of which sit comfortably alongside Oreo’s dark chocolate cookie, without one flavour drowning out the other. Chocolate desserts generally pair well with nutty, roasted flavours for this reason — it’s the same logic behind chocolate-hazelnut pairings in general.

    As for whether Nutella counts as “junk food” — that’s really a framing question rather than a factual one. Nutella is a high-sugar, high-fat spread, closer nutritionally to a chocolate spread than to a health food. That doesn’t make it off-limits in a dessert context; it just means it should be treated as a treat, not a health food.

    The Recipe: Baked Nutella Oreo Cheesecake

    Nutella Oreo Cheesecake

    Nutella Oreo Cheesecake

    Prep Time 15 minutes
    Total Time 1 hour 15 minutes
    Servings: 12
    Course: Dessert

    Ingredients
      

    For the Crust:
    • 12 Oreo cookies crushed (plus extra to serve)
    • 1 tbsp. white sugar
    • 2 tbsp. unsalted butter melted
    For the Filling:
    • 4 tbsp. milk
    • 1 cup Nutella
    • ½ tsp. espresso powder
    • 12 oz. cream cheese softened
    • 1/2 cup white sugar
    • 2 large eggs
    • ½ tsp. vanilla extract
    • 1 tbsp. flour

    Method
     

    1. Prep the Oven & Pan: Preheat the oven to 375°F (190°C) and slightly grease a 6-inch springform pan.
    2. Make the Crust: In a medium-sized bowl, combine the crushed Oreos, sugar, and melted butter. Press the crumb mixture firmly into the pan and bake for 10 minutes. Remove and set aside to slightly cool.
    3. Adjust Oven Temperature: Reduce the oven temperature to 350°F (175°C).
    4. Prepare the Nutella Base: In a saucepan, combine the milk and Nutella and heat on low until smooth and fully combined. Remove from heat and stir in the espresso powder to elevate the chocolate notes. Set the mixture aside.
    5. Mix the Cheesecake Filling: In a large bowl, beat together the softened cream cheese and white sugar for about 2 minutes until light. Add in the eggs one by one and beat again until well-combined. Finally, mix in the vanilla extract, flour, and your prepared Nutella-espresso mixture, beating until completely smooth.
    6. Bake: Pour the rich batter onto the prepared crust and bake for about 45 minutes, or until the edges are set and a toothpick placed into the edge of the cake comes out clean.
    7. Cool Gradually: Turn off the oven, leave the door open several inches, and let the cake sit inside to cool for about an hour.
    8. Chill: Remove the cake, cover it, and place it in the refrigerator for another hour (or longer) until fully chilled and ready to serve.
    9. Garnish & Serve: Top generously with crushed Oreos just before slicing. Enjoy!

    Frequently Asked Questions

    • Does Nutella go with Oreo? Yes — hazelnut-chocolate flavour pairs naturally with Oreo’s dark chocolate cookie, with neither one overpowering the other.
    • Why add espresso powder to the Nutella filling? A tiny pinch of espresso powder acts as a flavor enhancer, deepening the chocolate and hazelnut notes without making the cheesecake taste like coffee.
    • How do you prevent Nutella from separating when baked? Gently melting it with a bit of milk and folding it into a well-balanced cream cheese and egg batter helps stabilize the fats during baking.
    • Can I use Oreos as a cheesecake base? Yes — crush the whole cookie, mix with melted butter and sugar, and press into the pan.
    • What is the secret to cooling a baked cheesecake? Letting it cool slowly inside the turned-off oven with the door cracked prevents sudden temperature drops, which are the main cause of cracks.

    Final Thoughts

    This baked Nutella Oreo cheesecake proves that you don’t need a massive dessert to deliver huge flavor. Built for a cozy 6-inch pan, it brings together a crunchy chocolate crust and a silky Nutella filling that handles the oven beautifully.

    Try it this week, and if you have any questions about baking times or chilling, drop a comment below!

    Berry Ricotta Cheesecake: A Pastry Chef’s Guide to the Lighter, More Traditional Cheesecake

    Berry Ricotta Cheesecake

    Most cheesecake in North America is built on cream cheese — dense, rich, and unmistakably New York in style. But cheesecake has a much older lineage in Italy, particularly Sicily, where ricotta has always been the base. Berry ricotta cheesecake brings that tradition forward: a lighter filling that’s less heavy than the standard cream cheese version, finished with fresh berries and a dusting of confectioner’s sugar that play beautifully against ricotta’s mild, milky flavour.

    As a pastry chef, the questions I hear most about this dessert fall into two camps — is it actually healthier than the classic version, and is there a “real” traditional recipe worth following instead of just swapping ricotta into a standard cheesecake formula. This guide answers both, then walks you through building one from scratch using our precise tested proportions.

    Berry Ricotta Cheesecake

    Key Takeaways

    • Ricotta cheesecake and cream cheese cheesecake aren’t interchangeable — the texture, sweetness, and structure are genuinely different, not just a substitution.
    • Ricotta is measurably lower in calories and fat than full-fat cream cheese, so the health difference is real, not just marketing.
    • Traditional Sicilian ricotta cheesecake leans on the ricotta’s own unique texture, while this hybrid adaptation combines it with Neufchâtel for a foolproof balance.
    • The same mixing and baking mistakes that wreck a standard cheesecake apply here too, particularly regarding temperature control and cooling.
    • Full recipe details, precise yields, and a reader-question FAQ are below.

    How Is Ricotta Cheesecake Different from Regular Cheesecake?

    The difference starts with texture. Cream cheese cheesecake is dense, smooth, and holds a clean slice. Ricotta cheesecake is lighter and slightly grainy, with more moisture, because ricotta itself is a fresh, unripened whey cheese rather than a fermented, thickened one. The flavour shifts too — ricotta is milder and less tangy than cream cheese, so a ricotta cheesecake reads as less rich and a bit more like a custard than a dense bar.

    Structurally, traditional Italian and Sicilian versions often go further than just swapping the cheese. Many authentic recipes skip heavy additions, relying on the ricotta’s own body to hold its shape, sometimes with a thin pastry base instead. That’s the biggest gap between “ricotta cheesecake” as a North American variation and the traditional Sicilian version people are often actually asking about — the traditional version is closer to a baked cheese custard than a dense American cheesecake.

    Is Ricotta Cheesecake Actually Healthier?

    Per 100 grams, standard cream cheese runs around 350 calories and 34 grams of fat, compared to ricotta’s roughly 156 calories and 10 grams of fat — and using reduced-fat cream cheese (Neufchâtel) in our blend lowers the overall density even further. Ricotta also comes out ahead on protein and calcium, offering around 11 grams of protein and 240 mg of calcium per 100 grams versus cream cheese’s roughly 6 grams of protein and 97 mg of calcium. So yes, gram for gram, ricotta genuinely is the lighter, more nutrient-dense option.

    That said, a full ricotta cheesecake still contains sugar, eggs, and half-and-half, so it’s not a “diet” dessert — just a comparatively lighter one. As for cheesecake being “the unhealthiest dessert in the world,” that’s an exaggeration; it’s calorie-dense per slice like most rich baked desserts, but no more extreme than a slice of layered cake with buttercream once portion size is accounted for. Whether you’ll gain weight from eating it comes down to how much and how often, the same as with any dessert.

    Berry Ricotta Cheesecake

    Berry Ricotta Cheesecake

    Berry Ricotta Cheesecake is a lighter, traditional-inspired alternative to heavy North American cream cheese cheesecakes. Combining whole-milk ricotta, reduced-fat cream cheese, lemon, and almond extract, it features a crisp graham cracker crust and is topped with fresh berries and confectioner's sugar. It offers a smoother, less dense texture while delivering fewer calories and fat per serving.
    Prep Time 1 hour
    Cook Time 1 hour
    Total Time 2 hours
    Servings: 14 Servings
    Course: Dessert

    Ingredients
      

    For the crust:
    • 1 1/2 cups graham cracker crumbs
    • 6 tablespoons butter or margarine
    • 1 tablespoon of granulated sugar
    For the filling & topping:
    • 1 1/2 cups granulated sugar plus 1 tablespoon noted above for crust
    • 2 lemons for 1 tablespoon of peel/zest and at least 1/4 cup of juice
    • 15 ounces ricotta cheese
    • 16 ounces reduced-fat cream cheese Neufchâtel
    • 2 cups half-and-half
    • 2 teaspoons vanilla extract
    • 3 tablespoons cornstarch
    • 1/4 teaspoon salt
    • 1 teaspoon almond extract
    • 4 large eggs
    • 2 1/2 cups mixed berries
    • 1 tablespoon confectioners’ sugar

    Method
     

    1. Prep the Oven & Pan: Preheat oven to 375 degrees Fahrenheit (190°C). Cover the exterior part of a nine-inch springform pan with heavy-duty foil to prevent leakage, then spray the inside lightly with cooking spray.
    2. Make the Crust: Combine the graham cracker crumbs, 6 tablespoons of melted butter, and 1 tablespoon of granulated sugar in a medium bowl. Press the mixture firmly onto the bottom of the prepared springform pan.
    3. Bake the Crust: Bake the crust for 8–10 minutes until the edge is lightly browned. Let it cool on a wire rack. Reduce oven temperature to 325 degrees Fahrenheit (163°C).
    4. Prep the Lemons: Meanwhile, grate 1 tablespoon of lemon peel (zest) and squeeze out at least one-fourth cup of fresh lemon juice; set both aside.
    5. Beat the Cheeses: In the bowl of an electric mixer, beat the ricotta cheese and the reduced-fat cream cheese on high speed until completely smooth.
    6. Add Dry Ingredients: Beat in the cornstarch, 1/4 teaspoon salt, and 1 1/2 cups of granulated sugar. Scrape the sides of the bowl down with a rubber spatula, then continue beating on low speed until fully blended.
    7. Incorporate Liquids & Eggs: Add the half-and-half, almond extract, and vanilla extract, beating on low speed. Mix in the fresh lemon juice and lemon peel. Finally, beat in the eggs one by one until all ingredients are blended well.
    8. Bake: Fill the prepared crust with the batter and bake for one hour. Turn off the oven and leave the cake standing inside the closed oven for one additional hour to cool down gradually.
    9. Loosen & Chill: Loosen the edge of the cake by carefully running a thin knife around the inside of the pan. Cool on a pan rack for one hour before covering and placing in the refrigerator for at least six hours (and up to two days).
    10. Garnish & Serve: Just before serving, spread the mixed berries evenly on top of the cheesecake. Dust the confectioner’s sugar over the berries through a fine sieve. Slice and serve!

      Frequently Asked Questions

      • Is ricotta cheesecake healthier than cream cheese cheesecake? Yes — ricotta is measurably lower in calories and fat and higher in protein and calcium than full-fat cream cheese, and combining it with reduced-fat Neufchâtel lightens the profile further.
      • Why do we cover the springform pan in foil? Because the batter contains liquid dairy like half-and-half and ricotta, a foil wrap protects the bottom from water leaks if you use a water bath, or simply catches any butter seeping from the crust during baking.
      • What is the purpose of leaving the cake in the turned-off oven? It prevents sudden temperature drops, which cause the delicate custard structure to sink or crack in the center.
      • Can I prepare this in advance? Yes, keeping it chilled in the refrigerator for anywhere from 6 hours up to 2 days actually improves the texture and allows the flavors to meld completely.
      • What are common cheesecake mistakes to avoid? Overmixing the batter after adding the eggs, shocking the cake with sudden cold air when removing it from the oven, and skipping the chill time.
      • Will I gain weight if I eat cheesecake? Not from a single slice — like any rich dessert, the impact comes down to overall portion size and frequency, not the dessert itself.

      Final Thoughts

      Berry ricotta cheesecake isn’t just a lighter substitute for the classic version — it’s a genuinely different dessert with its own tradition, texture, and refined flavour profile from the lemon, almond, and fresh berries.

      Give it a try this week, and if your filling gives you any trouble or you have questions about the crust, leave a comment — I’ll help you troubleshoot exactly where it went off track.

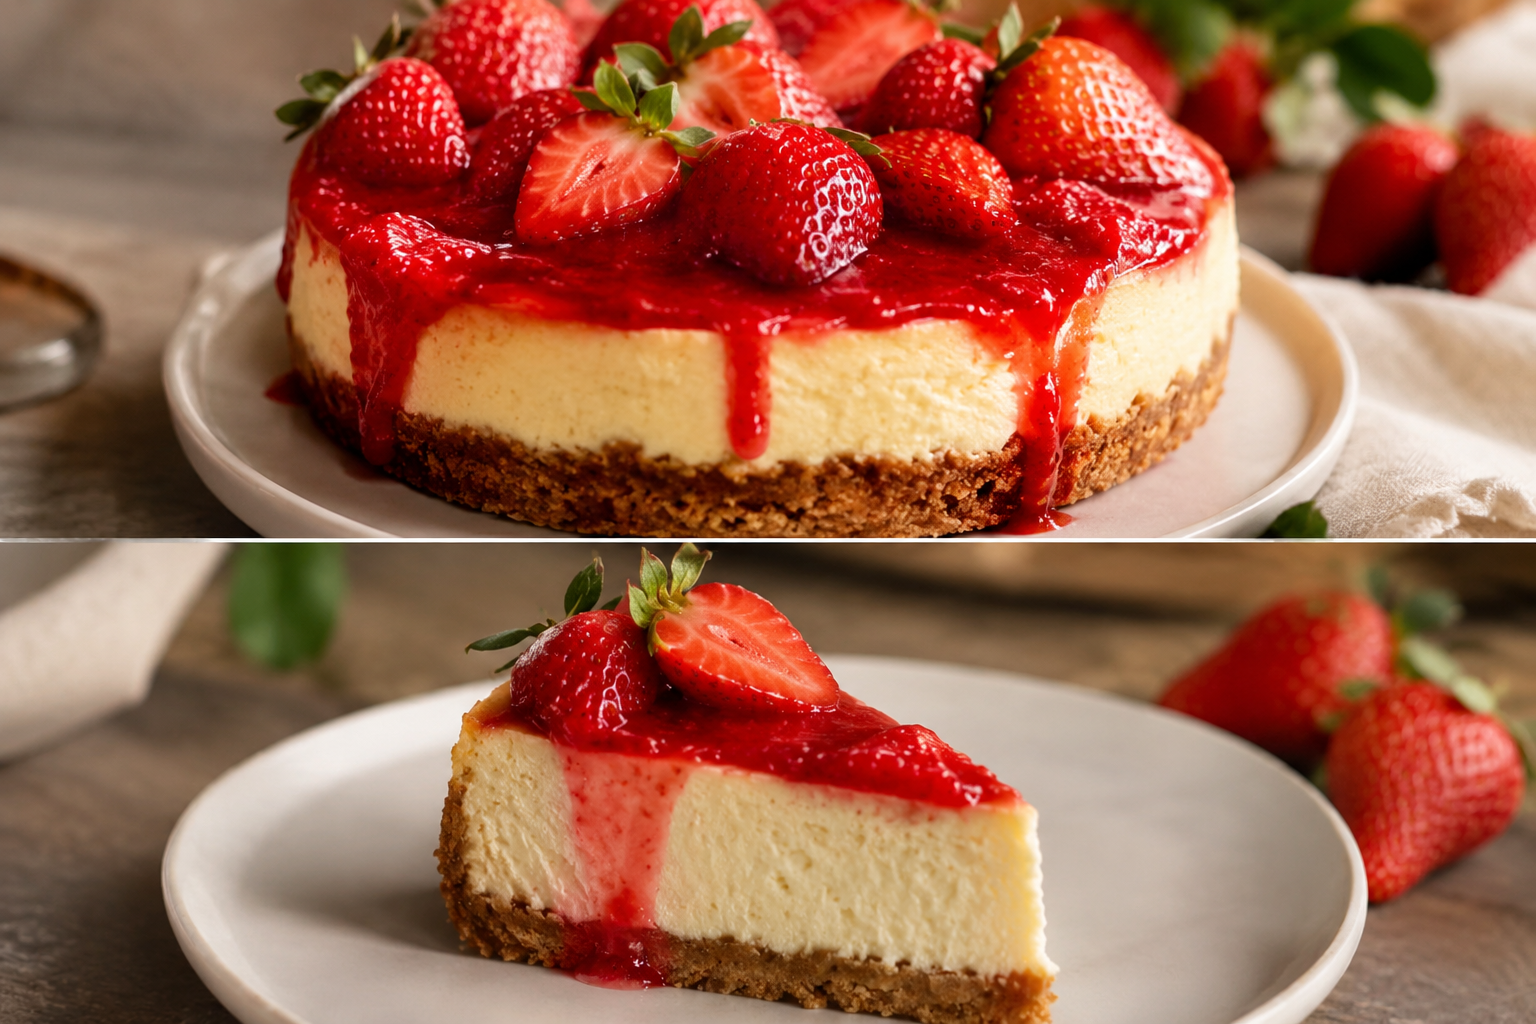
      Strawberry Cheesecake: A Pastry Chef’s Guide to Getting It Simple and Right

      Strawberry Cheesecake
      Strawberry Cheesecake

      Strawberry cheesecake is one of those desserts everyone assumes is complicated — springform pans, water baths, the fear of a cracked top ruining the whole thing. It doesn’t need to be. Underneath the fancy presentation, a good strawberry cheesecake comes down to a short list of ingredients and a handful of technique choices, done in the right order. It’s a staple at bakeries across Toronto for a reason: it’s rich without being heavy, and the strawberry topping keeps it feeling seasonal rather than dense and one-note.

      As a pastry chef, the questions I hear most about this dessert aren’t about flavour — they’re about simplicity and troubleshooting. Can you really make cheesecake with three or four ingredients? What’s actually going wrong when it cracks? Is there a real “secret” to a perfect one, or is that just marketing? This guide answers all of it, then gives you a full recipe to work from.

      Key Takeaways

      • A genuinely simple, few-ingredient cheesecake is possible — but “simple” changes the texture, and it’s worth knowing what you’re trading away.
      • Almost every cheesecake mistake traces back to one of three things: overmixing, oven temperature, or cooling too fast.
      • Underbaking slightly, not overbaking, is the safer target — cheesecake finishes setting as it cools.
      • Cheesecake isn’t automatically the “unhealthiest” dessert on a menu; that reputation is more about portion size than the dessert itself.
      • Full recipe and an FAQ built from real reader questions are below.

      What’s the Best Recipe for Strawberry Cheesecake?

      There isn’t a single “best” recipe so much as a best recipe for what you’re trying to achieve. A classic baked New York-style cheesecake — cream cheese, sugar, eggs, sour cream, baked slow in a water bath — gives you the dense, sliceable texture most people picture. A no-bake version, built on whipped cream or gelatin instead of eggs, gives you something lighter and quicker, at the cost of that same dense structure.

      The “secret” people ask about usually isn’t a secret ingredient — it’s technique. Room-temperature cream cheese and eggs blend smoothly without lumps; cold ingredients don’t, no matter how long you beat them. That single detail solves more cheesecake problems than any specific brand of cream cheese or a particular pan.

      Can You Really Make Cheesecake with 3 or 4 Ingredients?

      Yes, and it’s a genuinely useful shortcut — but it’s worth knowing what you’re giving up. A minimal-ingredient cheesecake typically strips things down to cream cheese, sugar, eggs, and sometimes vanilla, skipping the sour cream, crust, or water bath entirely. What you get is a denser, more straightforward custard that’s closer to a baked cheesecake filling on its own than a full bakery-style slice. It’s a great option on a weeknight or when you don’t have a full pantry, but it won’t have the same silky, layered texture as a version built with sour cream and a proper crust.

      If you want that stripped-down version to come out fluffier rather than dense, the fix isn’t adding more eggs — it’s beating the cream cheese and sugar together longer before adding eggs, and folding rather than stirring once they’re in. Overmixing after the eggs go in is actually the more common cause of a flat, heavy result.

      What Are the Most Common Cheesecake Mistakes?

      Nearly every cheesecake problem I get asked about comes down to one of three things:

      • Overmixing. Beating too much air into the batter, especially after the eggs are added, is the leading cause of cracks — the trapped air expands in the oven, then collapses as it cools, pulling the surface apart.
      • Baking temperature and time. Cheesecake is a custard, not a cake — it should still have a noticeable jiggle in the centre when you take it out. It’s better to underbake slightly than overbake; a slightly underdone centre firms up as it chills, while an overbaked one dries out and cracks.
      • Cooling too fast. A sudden temperature change — pulling a hot cheesecake straight into a cold fridge or a drafty kitchen — is what causes most late cracks, even in cheesecakes that baked perfectly. Letting it cool gradually in the oven with the door cracked open solves this almost every time.

      As for whether cheesecake is “the unhealthiest cake” — it’s not a fair label. Cheesecake is calorie-dense per slice, but so are most layered cakes with buttercream once you compare realistic portion sizes. The reputation comes more from how rich a single slice feels than from any real nutritional gap between desserts.

      The Recipe: Simple Baked Strawberry Cheesecake

      Strawberry Cheesecake

      Strawberry Cheesecake

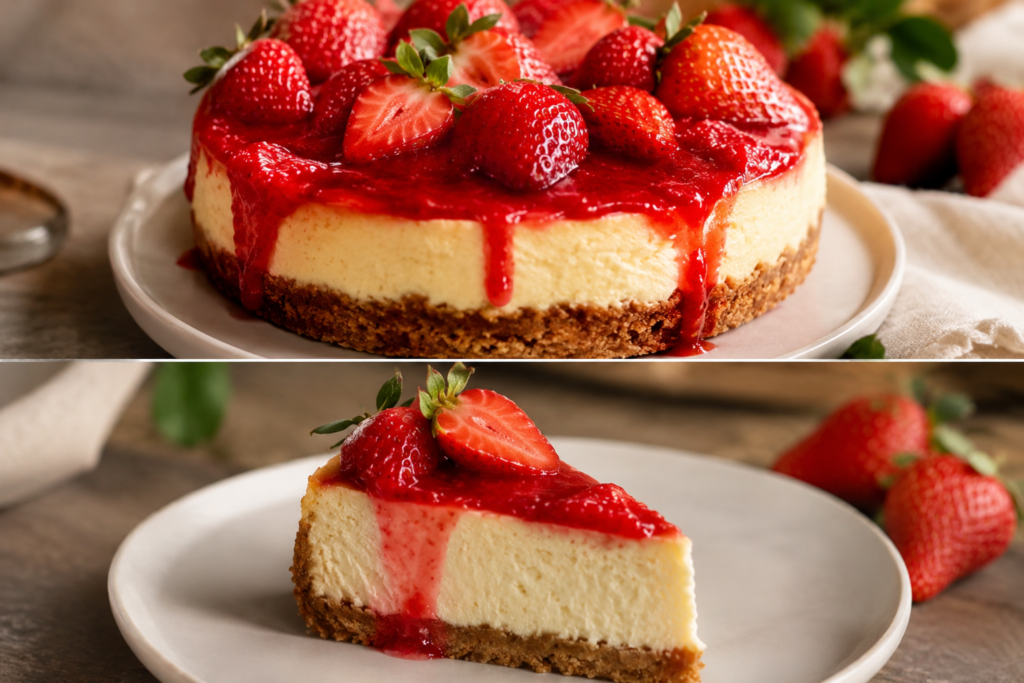
      A classic baked cheesecake on a graham crust, topped with fresh strawberry sauce.
      Total Time 1 hour 30 minutes
      Servings: 12 Slices
      Course: Dessert

      Ingredients
        

      For the crust:
      • 200 g about 2 cups graham cracker crumbs
      • 50 g ¼ cup granulated sugar
      • 115 g ½ cup unsalted butter, melted
      For the cheesecake filling:
      • 900 g four 8 oz/226 g blocks full-fat cream cheese, at room temperature
      • 300 g 1½ cups granulated sugar
      • 240 mL 1 cup sour cream, at room temperature
      • 1 tsp vanilla extract
      • 4 large eggs at room temperature
      For the strawberry topping:
      • 450 g about 3 cups fresh strawberries, hulled and halved
      • 100 g ½ cup granulated sugar
      • 15 mL 1 tbsp lemon juice
      • 1 tsp cornstarch mixed with 1 tbsp water

      Equipment

      • Stand or hand mixer
      • Roasting pan
      • Saucepan
      • 9-inch Springform Pan

      Method
       

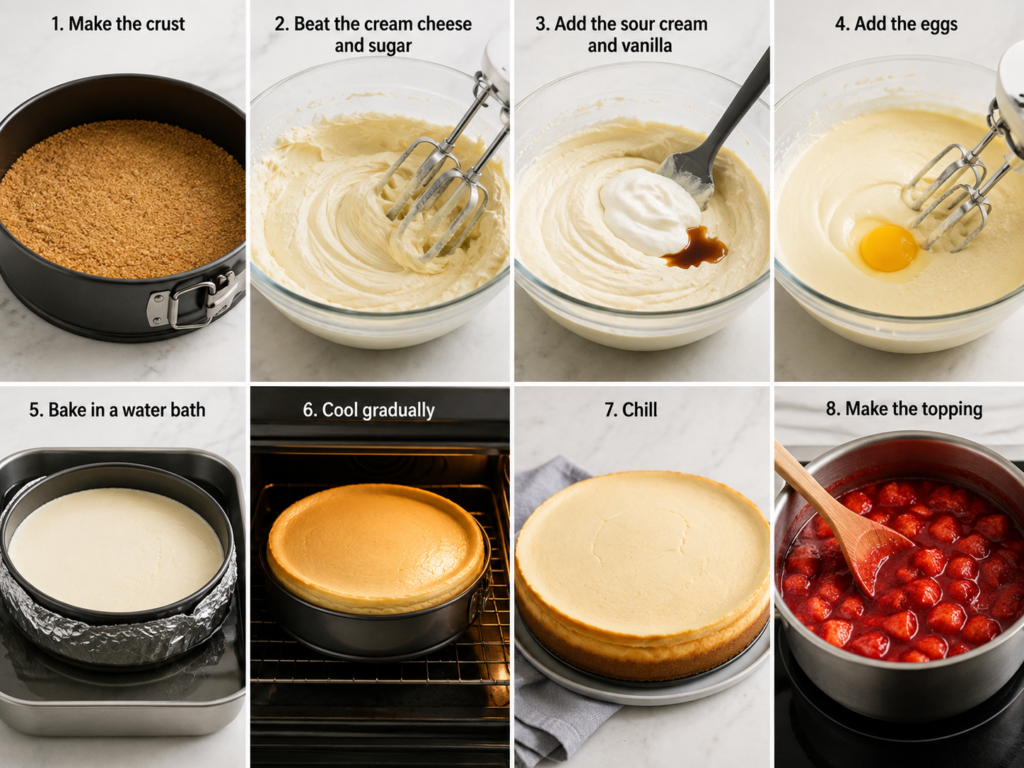
      1. Make the crust. Preheat the oven to 325°F (163°C). Combine the graham crumbs, sugar, and melted butter, then press firmly into the bottom of a 9-inch springform pan. Bake for 8–10 minutes, then set aside to cool.
      2. Beat the cream cheese and sugar. Using a stand or hand mixer, beat the room-temperature cream cheese and sugar on medium speed until completely smooth — this step matters more than any other for avoiding lumps.
      3. Add the sour cream and vanilla. Mix in just until combined.
      4. Add the eggs. Add eggs one at a time on low speed, mixing only until each one disappears into the batter. Stop as soon as the batter is smooth — this is the step most likely to cause cracks if overdone.
      5. Bake in a water bath. Wrap the outside of the springform pan in foil, set it in a larger roasting pan, and add hot water halfway up the sides. Bake for 55–65 minutes, until the edges are set and the centre still has a gentle jiggle.
      6. Cool gradually. Turn off the oven, crack the door open, and let the cheesecake sit inside for an hour before removing it. This slow cooldown is what prevents last-minute cracking.
      7. Chill. Refrigerate for at least 6 hours, ideally overnight.
      8. Make the topping. Combine strawberries, sugar, and lemon juice in a saucepan over medium heat. Simmer until the strawberries soften and release their juice, about 8 minutes. Stir in the cornstarch slurry and cook 1–2 more minutes, until thickened. Cool completely before spooning over the chilled cheesecake.
      Method Strawberry Cheesecake

      Frequently Asked Questions

      What is the secret to making a good cheesecake?
      Room-temperature ingredients and minimal mixing once the eggs are added — most texture problems trace back to one of those two things.

      What are common cheesecake mistakes to avoid?
      Overmixing the batter, overbaking past a slight centre jiggle, and cooling the cheesecake too quickly after it comes out of the oven.

      What is the 3-ingredient cheesecake?
      A stripped-down version using just cream cheese, sugar, and eggs, skipping the sour cream and crust for a denser, quicker result.

      How do you make cheesecake with 4 ingredients?
      Add vanilla extract to the 3-ingredient base — cream cheese, sugar, eggs, and vanilla — for a slightly more rounded flavour without adding complexity.

      Is it better to overbake or underbake cheesecake?
      Underbake slightly. Cheesecake continues to set as it cools, so a gentle jiggle in the centre when it comes out of the oven is exactly what you want.

      How do you make super fluffy cheesecake?
      Beat the cream cheese and sugar thoroughly before adding eggs, then fold rather than stir once they’re incorporated — overmixing at that stage flattens the texture.

      Is cheesecake the unhealthiest cake?
      Not really — it’s rich per slice, but comparable to most layered cakes with buttercream once you account for typical portion sizes.

      Final Thoughts

      Strawberry cheesecake has a reputation for being finicky that it doesn’t fully deserve. Once you understand that most problems come down to mixing, temperature, and cooling speed — not a missing secret ingredient — it becomes one of the more forgiving desserts to bake well. Start with the full recipe above, or strip it down to a simple 3- or 4-ingredient version on a night when you want something quick.

      Try it this week, and if you run into cracks or a filling that won’t set, leave a comment — I’ll help you figure out exactly which step to adjust.

      Key Lime Cheesecake: A Pastry Chef’s Guide to Getting the Tart-and-Creamy Balance Right

      KEY LIME CHEESECAKE
      KEY LIME CHEESECAKE

      Key lime pie has a loyal following, and cheesecake has an even bigger one — so it was only a matter of time before someone put the two in the same dessert. Key lime cheesecake takes the sharp, citrusy punch of Key lime and folds it into a dense, creamy cheesecake base, usually over a graham cracker crust that echoes the original pie. It’s become a regular request in Canadian bakeries during the summer months, when people want something rich but still bright and refreshing.

      As a pastry chef, the questions I get about this dessert are fairly consistent — what actually separates it from Key lime pie, whether it’s a “real” thing or just a novelty, what cream cheese does to the texture, and which version to order if you’re at a restaurant. This guide walks through all of it, then gives you a full recipe to build your own.

      Key Takeaways

      • Key lime pie and Key lime cheesecake share the same flavour base but differ completely in texture, structure, and how they’re baked.
      • Key lime cheesecake is a legitimate, established dessert — including a well-known Basque-style version — not just a marketing mashup.
      • Adding cream cheese to a Key lime pie recipe changes it into a different dessert entirely rather than just “improving” the original.
      • The most common mistakes with Key lime desserts come down to juice substitution and overbaking, not the recipe itself.
      • Full recipe and an FAQ pulled straight from real reader questions are below.

      What Actually Separates Key Lime Pie from Key Lime Cheesecake?

      The flavour profile is nearly identical — both rely on Key lime juice, which is more floral and slightly less acidic than standard Persian lime juice, along with sweetened condensed milk in most traditional recipes. The difference is structural. Key lime pie is a custard: eggs, condensed milk, and lime juice baked into a single thin layer inside a crust, typically no more than an inch deep. Key lime cheesecake is a cream cheese-based filling, several inches thick, baked low and slow, often in a water bath to prevent cracking.

      That structural difference changes the eating experience more than people expect. Pie is light and sets almost like a mousse; cheesecake is dense and holds its shape on a fork. If you’re deciding which is “healthier,” neither one has a real advantage — pie generally uses less fat overall, but cheesecake’s larger cream cheese content isn’t dramatically worse once you compare typical slice sizes. The gap is smaller than most people assume.

      Is Key Lime Cheesecake Actually a Real Thing?

      Yes — and it’s more established than people realize. Beyond the standard baked version, there’s a well-known Basque-style Key lime cheesecake, which uses the crustless, deliberately over-browned technique that’s become popular over the last several years. That style leans into a slightly burnt top and a looser, almost molten centre, which pairs surprisingly well with Key lime’s acidity cutting through the richness.

      As for the naming — “Key lime” specifically refers to the smaller, more aromatic lime variety grown in the Florida Keys, not just a branding choice. It’s genuinely a different fruit from the limes sold in most Canadian grocery stores, which is why so many recipes call for bottled Key lime juice; fresh Key limes can be hard to source outside specialty stores.

      What Does Adding Cream Cheese to Key Lime Pie Actually Do?

      This is less “improving the pie” and more “creating a different dessert.” Once you add a meaningful amount of cream cheese to a traditional Key lime pie filling, you’re no longer making a custard — you’re making a cheesecake with pie proportions. The texture shifts from light and jiggly to dense and rich, and the tartness gets slightly muted because cream cheese carries its own mild tang that competes with the lime rather than amplifying it.

      If your goal is a fluffier result rather than a denser one, the fix isn’t more cream cheese — it’s whipped egg whites folded in gently, or using room-temperature ingredients so the batter incorporates air properly. The most common mistake I see is using bottled lime juice that isn’t labelled specifically as Key lime, which throws off the acidity balance the recipe was built around. The second most common mistake is overbaking: both pie and cheesecake versions should still have a slight wobble in the centre when you pull them from the oven — they finish setting as they cool.

      What’s the Best Version to Order at a Restaurant?

      Across cheesecake rankings and restaurant reporting, classic strawberry remains the single best-selling cheesecake flavour at chains like The Cheesecake Factory, a title it’s held for more than four decades — so if you’re ordering the safest bet, that’s usually it, not the Key lime specifically. That said, Key lime and its mango-key-lime variation do show up on 2026 chain rankings among the flavours worth trying, and reviewer opinions on it are genuinely mixed rather than universally positive — some praise its brightness, others find it too tart for a cheesecake format. If citrus desserts aren’t usually your first choice at a restaurant, it’s worth ordering as a split slice before committing to a full piece.

      The Recipe: Layered Key Lime Cheesecake with Lime Custard & Sour Cream Topping

      This version builds in three distinct layers — a cooked Key lime custard on the bottom, a cream cheese filling over top, and a sour cream topping baked on at the end — for a cheesecake that’s noticeably more citrus-forward than a standard single-batter version. Makes one 9-inch (23 cm) cheesecake, 12–14 slices.

      KEY LIME CHEESECAKE

      KEY LIME CHEESECAKE

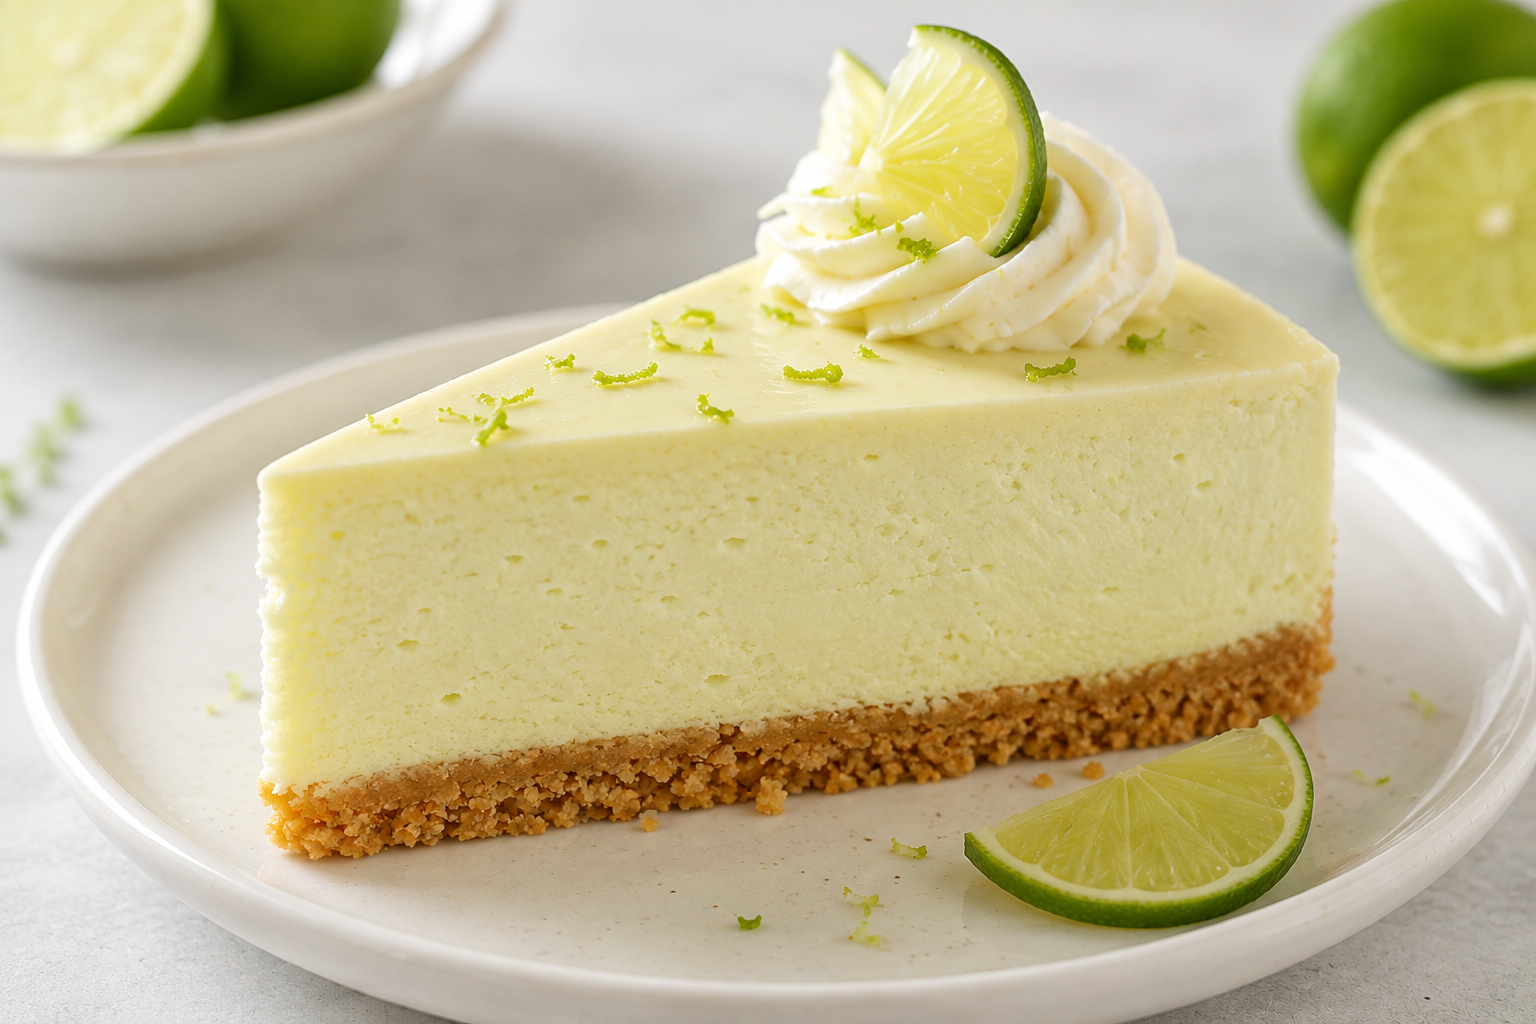
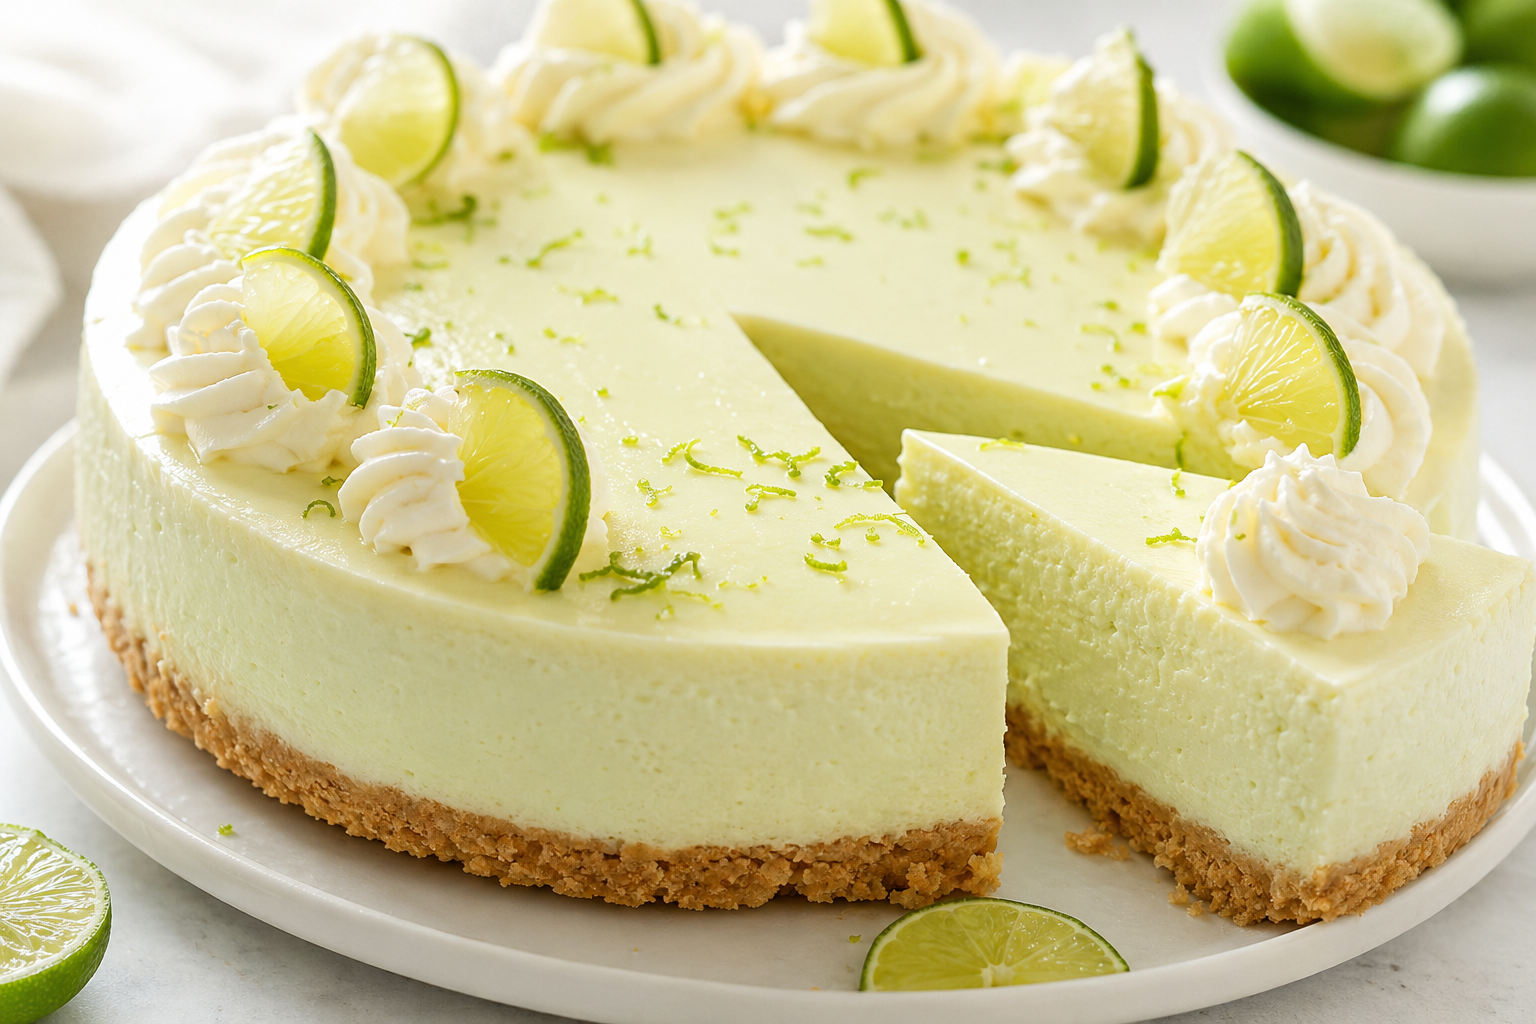
      A 9-inch cheesecake built in three distinct layers: a cooked Key lime custard on the bottom, a cream cheese filling spooned over it, and a sweetened sour cream topping baked on at the very end. It sits on a graham cracker crust and bakes in a water bath for a smooth, crack-free texture. The result is a citrus-forward cheesecake with more depth than a standard single-batter version — tangy custard base, rich creamy middle, and a light tart topping. Chills overnight and finishes with fresh lime slices.
      Servings: 12 slices
      Course: Dessert

      Ingredients
        

      For the Key lime custard
      • 6 large egg yolks
      • 150 g ¾ cup sugar
      • 90 mL 6 tbsp fresh Key lime juice
      • 1 tsp grated Key lime peel
      For the crust
      • 175 g 1¾ cups graham cracker crumbs
      • 50 g ¼ cup sugar
      • ½ tsp salt
      • 115 g ½ cup unsalted butter, melted
      For the cheesecake filling
      • 450 g two 8 oz/226 g packages cream cheese, at room temperature
      • 135 g ⅔ cup sugar, plus 3 tbsp reserved for the topping
      • 2 large eggs
      • 45 mL 3 tbsp fresh Key lime juice
      • 1 tbsp grated Key lime peel
      • 1 container 450 g/16 oz sour cream
      To garnish: fresh lime slices

      Equipment

      • Large saucepan for cooking the Key lime custard
      • Whisk to combine and stir the custard while it thickens
      • Zester or fine grater for the Key lime peel
      • Citrus juicer for the fresh Key lime juice
      • 2 Large mixing bowl one for the crust mixture, one for the cream cheese filling

      Method
       

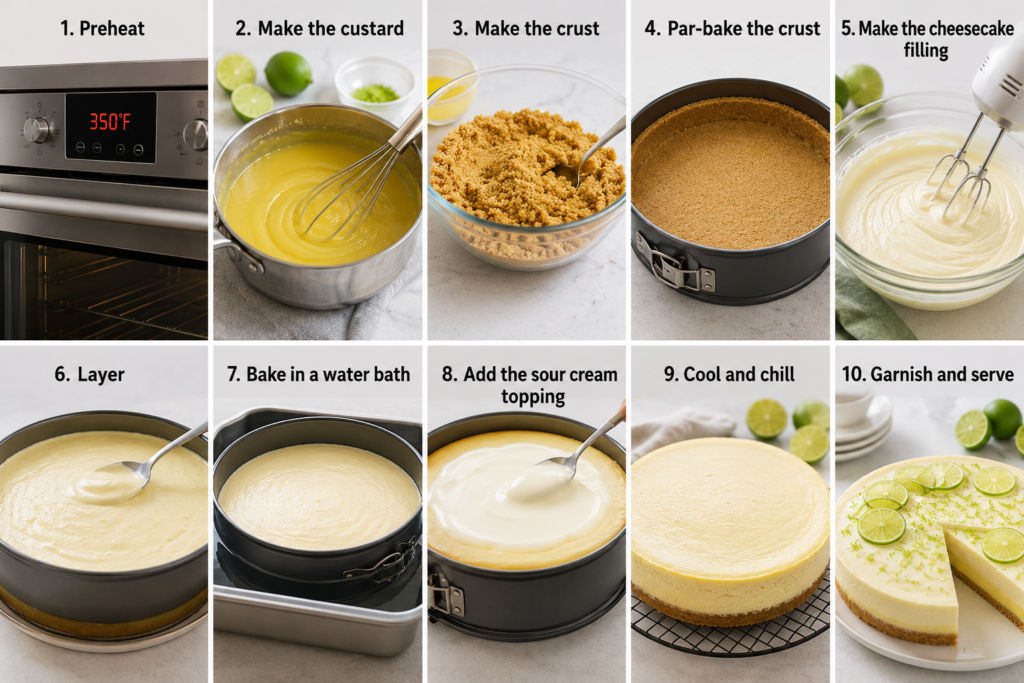
      1. Preheat. Set the oven to 350°F (177°C).
      2. Make the custard. In a large saucepan over medium heat, whisk together the egg yolks, sugar, Key lime juice, and lime peel. Bring to a boil, stirring continuously, then reduce the heat and cook for 8 more minutes, until the mixture thickens into a custard. Remove from heat and let cool to room temperature.
      3. Make the crust. In a large bowl, combine the graham cracker crumbs, sugar, salt, and melted butter. Press into the bottom and about 1 inch (2.5 cm) up the sides of a 9-inch springform pan.
      4. Par-bake the crust. Bake for 5 minutes, then remove from the oven.
      5. Make the cheesecake filling. Beat together the cream cheese, ⅔ cup (135 g) sugar, eggs, Key lime juice, and lime peel until smooth and creamy.
      6. Layer. Spoon the cooled custard into the crust and spread it into an even layer. Carefully spoon the cream cheese filling over top, smoothing gently so the layers stay distinct.
      7. Bake in a water bath. Set the springform pan into a larger baking pan and add hot water until it comes 1 inch (2.5 cm) up the sides. Bake for 45 minutes, until the centre is almost set.
      8. Add the sour cream topping. While the cheesecake bakes, stir together the sour cream and the remaining 3 tablespoons of sugar. Once the 45 minutes are up, spoon the mixture over the hot cheesecake and return it to the oven for another 10 minutes.
      9. Cool and chill. Let the cheesecake cool completely, then cover and refrigerate until fully set — at least 6 hours, ideally overnight.
      10. Garnish and serve. Top with fresh lime slices just before slicing.
      key lime cheesecake

        Frequently Asked Questions

        How is Key lime pie different from cheesecake?
        Pie is a thin egg-and-condensed-milk custard baked into a crust, while cheesecake is a much thicker cream cheese filling, usually baked in a water bath — same core flavour, different structure entirely.

        Which is healthier, cheesecake or Key lime pie?
        Neither has a clear advantage. Pie tends to use less fat overall, but the gap narrows once you compare realistic slice sizes.

        Is Key lime cheesecake just lime cheesecake?
        No — Key limes are a distinct, more aromatic fruit from the ones typically sold in Canadian grocery stores, which is why most recipes specifically call for Key lime juice.

        What is Key lime Basque cheesecake?
        It’s a crustless, deliberately over-browned cheesecake style with a soft, almost molten centre, adapted here with Key lime juice cutting through the richness.

        Is Key lime pie better with cream cheese?
        It’s not strictly “better” — adding cream cheese turns it into a different dessert (a cheesecake) rather than an upgraded version of the original pie.

        What are common mistakes when making Key lime pie or cheesecake?
        Using regular lime juice instead of Key lime juice, and overbaking past the point where the centre should still have a slight wobble.

        How do you make Key lime pie fluffier?
        Fold in whipped egg whites and use room-temperature ingredients so the batter holds air properly — adding more cream cheese will make it denser, not fluffier.

        Final Thoughts

        Key lime cheesecake isn’t a shortcut version of the pie — it’s its own dessert, built on the same bright, floral lime flavour but with a completely different texture and technique. Whether you’re after the dense, classic baked version above or want to try the Basque-style approach next, the fundamentals stay the same: real Key lime juice, room-temperature ingredients, and a gentle hand with the mixer.

        Give the recipe a try this week, and if your centre cracks or your filling comes out too tart or too sweet, leave a comment — I’ll help you dial it in before your next bake.

        Carrot Cake Cheesecake: A Pastry Chef’s Guide

        Carrot CheeseCake

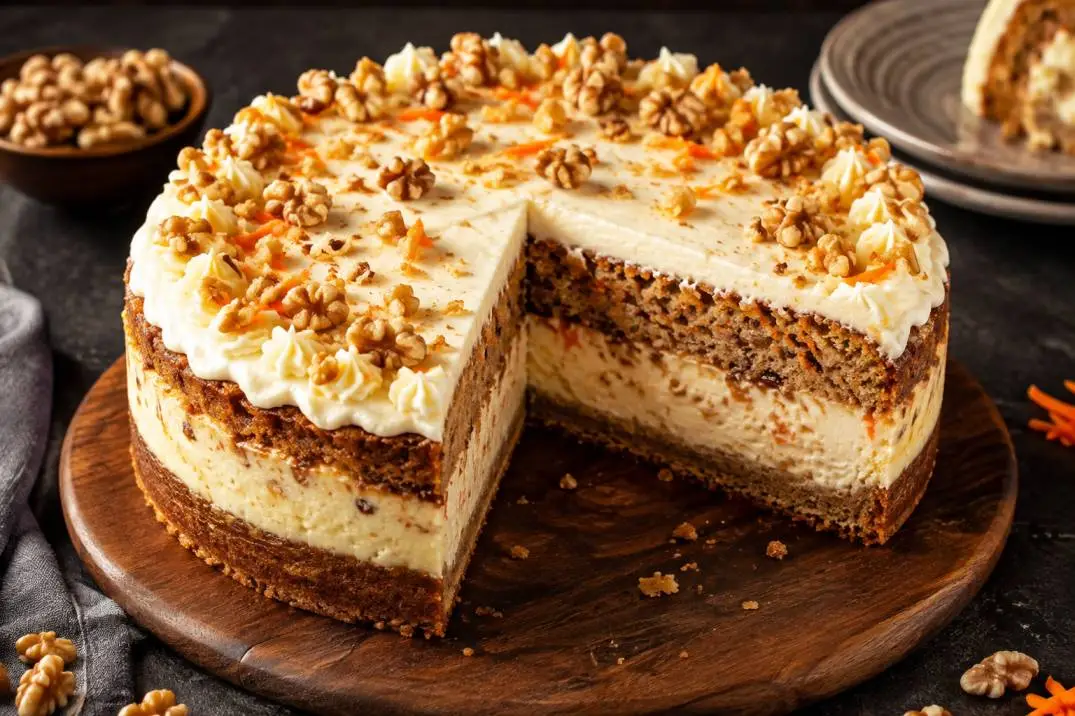
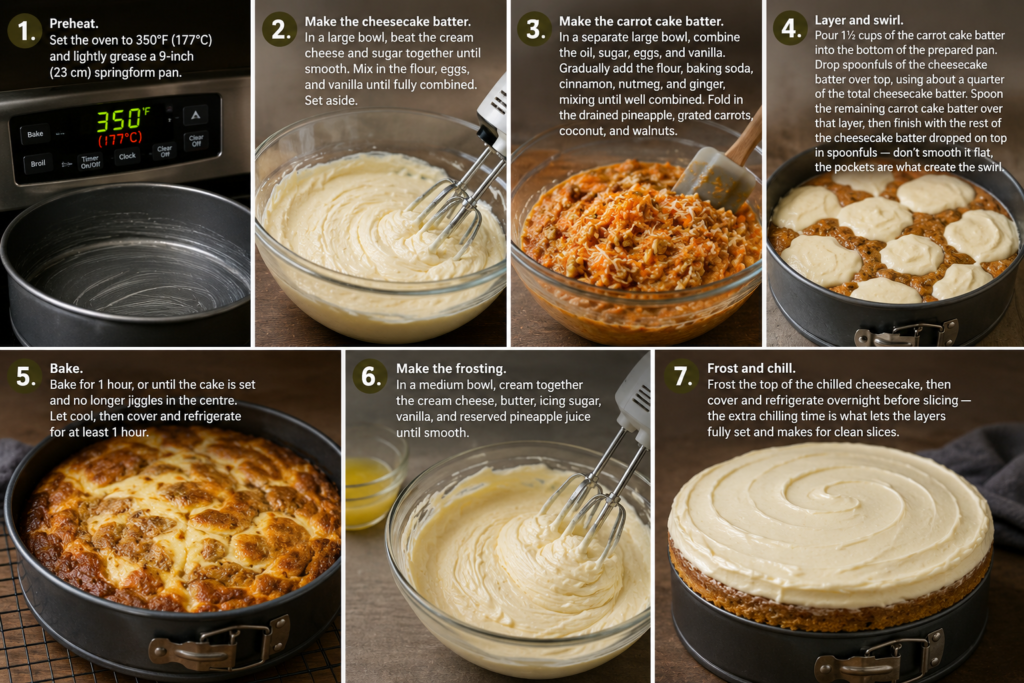
        Carrot cake or cheesecake? For years, that question ended in a stalemate at dinner tables across Canada — until bakers stopped choosing and started layering. Swirled carrot cake cheesecake marries the warm, spiced comfort of classic carrot cake with the dense, tangy richness of New York-style cheesecake, finished with a swoop of pineapple cream cheese frosting.

        As a pastry chef, I get asked about this dessert constantly — is it actually good, can you make it without an oven, does the frosting really belong on top, and what happened to the version restaurants used to serve. This guide answers all of it, then walks you through building your own from scratch.

        Key Takeaways

        • Carrot cake cheesecake works because the tartness of the cheesecake layer cuts the sweetness of the spiced cake — they balance each other rather than compete.
        • It’s not automatically “healthier” or “unhealthier” than a standard slice of either dessert; portion size and frosting quantity matter more than which dessert it started as.
        • A no-bake version is absolutely possible, but it changes the texture of the cheesecake layer, and there are a few mistakes that ruin it every time.
        • Cream cheese frosting isn’t optional — it’s the ingredient that ties both layers together, both structurally and in flavour.
        • Full recipe and troubleshooting FAQ are below, sized for a standard 9-inch springform pan.

        Is Carrot Cake Cheesecake Actually Good?

        Short answer: when it’s made correctly, yes — noticeably better than either dessert on its own. The reason comes down to contrast. Carrot cake leans sweet and spiced, with cinnamon, nutmeg, and often crushed pineapple or shredded coconut adding moisture. Cheesecake, on the other hand, is tangy and dense from cream cheese and sour cream. Stacked together, the cheesecake layer stops the cake from tasting one-note sweet, and the cake keeps the cheesecake from feeling heavy. That balance is exactly why the combination has staying power rather than being a passing trend.

        You’ll sometimes see carrot cake nicknamed “divorce cake” online. The name isn’t about the dessert itself — it’s an internet joke referencing an old news story where a couple’s divorce settlement famously came down to fighting over a carrot cake recipe. It has nothing to do with the cake’s ingredients or quality; it’s just a name that stuck.

        As for which is “healthier,” neither carrot cake nor cheesecake earns that label in a meaningful sense. Carrot cake often carries a health halo because of the vegetable in its name, but a slice can carry as much sugar and fat as cheesecake once you account for oil, sugar, and cream cheese frosting. If you’re comparing the two, look at portion size and frosting thickness before you look at which one has carrots in it.

        Can You Make a No-Bake Version?

        Yes, and for home bakers without a lot of oven space — or in the middle of a Canadian summer when you don’t want to run the oven — this is often the better route. A no-bake cheesecake layer relies on gelatin or a high ratio of whipped cream and cream cheese to set, rather than eggs and heat. The carrot cake layer, however, still needs to be baked separately; there’s no way around that, since raw cake batter won’t set without heat.

        The texture difference is real: a baked cheesecake layer is denser and slightly firmer, while a no-bake layer is lighter and mousse-like. Neither is “better” — it’s a matter of preference. The most common mistakes I see with no-bake versions are under-chilling (give it a minimum of six hours, ideally overnight) and using low-fat cream cheese, which won’t set properly. Stick to full-fat, block-style cream cheese, not the spreadable tub kind, and you’ll avoid the runny-middle problem that trips up most first attempts.

        Does Cream Cheese Frosting Belong on Carrot Cake?

        Unambiguously yes — it’s traditional, not optional. Carrot cake’s spice profile needs the tang of cream cheese frosting to cut through the sweetness; a plain buttercream leaves the cake tasting flat. The secret to getting it right is temperature and ratio: your cream cheese and butter both need to be properly softened (not melted) before creaming, and you want roughly equal parts cream cheese to butter so the frosting holds its shape without weeping. The most common carrot cake mistake isn’t the cake at all — it’s frosting a cake that hasn’t fully cooled, which melts the frosting into the crumb instead of sitting on top of it.

        What About the Restaurant Version?

        If you’ve had carrot cake cheesecake at a chain restaurant, availability tends to shift by season and location rather than disappearing outright — dessert menus rotate more often than people expect, and a favourite can vanish from one location while still running at another. If you’re chasing a specific restaurant version, your best bet is calling ahead or checking the current menu directly, since these things change throughout the year. The good news is that a homemade version, done well, holds up against any restaurant plate.

        The Recipe: Swirled Carrot Cake Cheesecake with Pineapple, Coconut & Walnuts

        This is the version I actually recommend to home bakers who want something closer to a true swirl than a stacked layer cake — the cheesecake batter is dropped straight into the carrot cake batter and marbled together in one pan, then finished with a pineapple-spiked cream cheese frosting. Makes one 9-inch (23 cm) springform cake, 12–14 slices.

        Carrot CheeseCake

        Carrot Cake Cheesecake

        Carrot Cake Cheesecake combines moist, spiced carrot cake with creamy, tangy cheesecake and classic cream cheese frosting. This guide covers the key techniques, a complete baked recipe, no-bake options, common mistakes, and helpful FAQs.
        Servings: 12 Slices
        Course: Dessert

        Ingredients
          

        For the cheesecake batter
        • 450 g 16 oz cream cheese, at room temperature
        • 150 g ¾ cup sugar
        • tsp vanilla extract
        • 1 tbsp flour
        • 3 eggs
        For the carrot cake batter
        • 180 mL ¾ cup vegetable oil
        • 200 g 1 cup sugar
        • 2 eggs
        • tsp vanilla extract
        • 125 g 1 cup flour
        • 1 tsp baking soda
        • tsp ground cinnamon
        • 1 tsp ground nutmeg
        • ½ tsp ground ginger
        • 227 g 8 oz can crushed pineapple in 100% juice, drained well — reserve the juice
        • 100 g 1 cup grated carrots
        • 40 g ½ cup shredded coconut
        • 50 g ½ cup chopped walnuts
        For the pineapple cream cheese frosting
        • 60 g 2 oz cream cheese, softened
        • 1 tbsp butter softened
        • 220 g 1¾ cups icing sugar (confectioners’ sugar)
        • 1 tsp vanilla extract
        • 1 tbsp reserved pineapple juice

        Equipment

        • Stand Mixer
        • 9-inch Springform Pan
        • Round Cake Pans
        • Wire Cooling Rack

        Method
         

        1. Prep Equipment: Preheat oven to 350°F (177°C). Lightly grease a 9-inch springform pan and line the bottom with parchment paper.
        2. Make Cheesecake Batter: Beat cream cheese and sugar on medium speed until smooth. Mix in flour, vanilla, and eggs one at a time until combined. Do not overmix. Set aside.
        3. Make Carrot Cake Batter: Whisk oil, sugar, eggs, and vanilla in a separate bowl. Whisk in flour, baking soda, cinnamon, nutmeg, and ginger. Fold in drained pineapple, grated carrots, coconut, and walnuts.
        4. Layer & Swirl: Pour 1.5 cups of carrot cake batter into the pan. Dollop 25% of the cheesecake batter on top. Layer remaining carrot cake batter, then dollop the rest of the cheesecake batter. Gently drag a butter knife through the layers to create a marbled pattern.
        5. Bake & Gradual Cool: Bake for 55–60 minutes until edges are set and center has a slight wobble. Turn off oven, crack door open 2 inches, and let sit inside for 1 hour. Transfer pan to a wire rack to cool completely at room temperature (1.5–2 hours).
        6. Chill: Cover pan loosely and refrigerate for at least 4 to 6 hours (ideally overnight).
        7. Frost & Serve: Beat frosting ingredients until smooth. Spread over chilled cheesecake before releasing the springform ring. Slice with a warm, sharp knife.
        Method Carrot Cheesecake

        Frequently Asked Questions

        Can I freeze swirled carrot cake cheesecake?
        Yes. Wrap slices tightly in plastic wrap and aluminum foil. Freeze for up to 2 months. Thaw overnight in the refrigerator before serving.

        Why did my cheesecake layer crack?
        Overmixing incorporated extra air, or sudden cooling caused shrinkage. Cracking is prevented by cooling the cake slowly inside the turned-off oven before room-temperature cooling.

        Can I substitute low-fat cream cheese?
        It is not recommended. Low-fat varieties contain higher water content, which causes a runny center and prevents proper setting.

        Final Thoughts

        Carrot cake cheesecake isn’t a novelty mashup — it’s a genuinely well-engineered dessert once you understand why the pairing works: contrast in texture, contrast in flavour, and a frosting that ties both halves together. Whether you go the classic baked route above or a lighter no-bake cheesecake layer for a warm-weather bake, the technique matters more than the shortcut you choose.

        Try the recipe this weekend, and if you run into a cracked cheesecake layer or a cake that won’t release from the pan, drop a comment — I’ll help you troubleshoot it before your next attempt.